HOME IMPROVEMENT
Roof Cricket: Complete Guide to Design, Purpose, Installation, and Best Practices

Introduction
A roof cricket is one of those small roofing components that most homeowners never notice—until a leak appears near a chimney or roof penetration. A properly designed roof cricket helps redirect water away from vulnerable areas, preventing long-term structural damage and costly repairs. In modern roofing systems, a roof cricket plays a crucial role in improving drainage efficiency and extending roof lifespan.
Whether you’re building a new home or repairing an old roof, understanding how a roof cricket works can save you from repeated maintenance issues. In this guide, we’ll break down everything in simple, practical terms so you can make informed roofing decisions.
Roof cricket: What it is and why it matters
A roof cricket is a small, peaked structure built on the high side of a chimney or roof obstruction. Its primary job is to divert water, snow, and debris around the obstacle so it doesn’t accumulate behind it.
In roofing systems, flat or obstructed areas are prone to water pooling. Over time, this leads to leaks, mold growth, and even structural decay. A roof cricket eliminates this risk by creating a slope that directs water into the gutters or drainage system.
Key functions of a roof cricket
| Function | Description | Importance Level |
|---|---|---|
| Water diversion | Redirects rainwater around chimneys or walls | High |
| Leak prevention | Reduces standing water behind roof structures | Very High |
| Snow management | Prevents snow buildup in cold regions | Medium-High |
| Roof longevity | Extends overall roof lifespan | High |
| Structural protection | Protects flashing and joints | Very High |
Why a roof cricket is essential in modern roofing systems
Many roofing problems begin with poor water drainage. Areas behind chimneys or skylights are especially vulnerable because water naturally slows down and collects there. A roof cricket ensures continuous movement of water, preventing damage before it starts.
In colder climates, melting snow can refreeze in these pockets, creating ice dams. This adds pressure on roofing materials and increases leak risks. A well-built roof cricket reduces these hazards significantly.
Types of roof cricket designs
Roof crickets come in different shapes and materials depending on roof style and climate conditions. Choosing the right design ensures better performance and durability.
| Type | Description | Best Use Case |
|---|---|---|
| Gable-style cricket | Triangular, peaked design | Most residential roofs |
| Saddle cricket | Two-sided slope design | Wide chimneys or large obstructions |
| Flat cricket | Minimal slope structure | Low-slope roofing systems |
| Metal cricket | Pre-fabricated metal structure | Commercial buildings |
| Asphalt-shingled cricket | Built using same roofing material | Seamless residential integration |
Each design serves the same purpose but differs in complexity, cost, and durability.
How a roof cricket is built
Constructing a roof cricket requires careful planning and precise slope calculations. Even small errors can affect water flow efficiency.
Step-by-step overview
| Step | Process | Description |
|---|---|---|
| 1 | Measurement | Identify chimney width and roof slope |
| 2 | Design layout | Plan cricket slope direction |
| 3 | Framing | Build triangular wooden structure |
| 4 | Sheathing | Cover frame with plywood or board |
| 5 | Waterproofing | Install underlayment or membrane |
| 6 | Roofing finish | Apply shingles or metal covering |
| 7 | Flashing | Seal edges to prevent leaks |
Proper flashing installation is one of the most critical steps, as most roof failures occur due to water intrusion at joints.
Materials used in roof cricket construction
The materials used depend on roofing type and budget. Each option has its strengths.
| Material | Advantages | Disadvantages |
|---|---|---|
| Wood framing | Easy to shape, cost-effective | Needs waterproofing |
| Plywood sheathing | Strong base support | Can absorb moisture if unsealed |
| Metal sheets | Highly durable, long-lasting | Higher cost, noisy in rain |
| Asphalt shingles | Matches roof appearance | Shorter lifespan than metal |
| Waterproof membrane | Excellent leak protection | Requires professional installation |
Benefits of installing a roof cricket
A roof cricket offers more value than most homeowners realize. It is a small investment that prevents large-scale roofing issues.
Major benefits include:
- Prevents water pooling behind chimneys
- Reduces risk of roof leaks and moisture damage
- Improves drainage efficiency during heavy rain
- Extends lifespan of roofing materials
- Protects chimney flashing from deterioration
- Reduces ice dam formation in winter climates
A well-installed roof cricket often pays for itself by avoiding expensive repair work.
Installation process of a roof cricket
The installation process varies slightly depending on roof type, but the core steps remain similar.
| Phase | Activity | Tools Required |
|---|---|---|
| Planning | Slope calculation and design | Measuring tape, chalk line |
| Framing | Building wooden structure | Saw, nails, hammer |
| Waterproofing | Adding protective layer | Roofing membrane, adhesive |
| Roofing finish | Installing shingles or metal | Roofing nails, cutter |
| Sealing | Flashing and joint sealing | Sealant, metal flashing |
Proper alignment is essential during installation. Even a minor slope error can disrupt water flow and reduce effectiveness.
Pros and cons of a roof cricket
Like any roofing feature, a roof cricket has advantages and limitations.
Pros
- Highly effective water drainage solution
- Reduces long-term maintenance costs
- Protects structural integrity of roof
- Works with most roof designs
- Improves overall roof performance
Cons
- Increases initial construction cost
- Requires skilled installation
- Not always necessary on simple roof designs
- May add complexity to roof layout
Despite the drawbacks, the benefits usually outweigh the costs, especially for roofs with chimneys or multiple penetrations.
Common mistakes in roof cricket installation
Even experienced contractors can make errors that reduce effectiveness.
Frequent mistakes include:
- Incorrect slope angle calculation
- Poor flashing installation
- Using incompatible materials
- Skipping waterproof underlayment
- Ignoring chimney size and placement
- Poor integration with existing roofing system
Avoiding these mistakes ensures long-lasting protection and performance.
Best practices for a durable roof cricket
To ensure maximum efficiency, follow these proven best practices:
- Always match cricket design to roof slope
- Use high-quality waterproofing materials
- Ensure proper integration with chimney flashing
- Maintain consistent slope for water flow
- Hire experienced roofing professionals
- Inspect cricket during routine roof maintenance
Regular inspection after storms or heavy snowfall also helps detect early signs of wear.
Conclusion
A roof cricket may seem like a minor roofing feature, but its impact on water drainage and roof longevity is significant. By redirecting water away from vulnerable areas, it protects your home from leaks, moisture damage, and structural issues. Whether you’re building a new roof or upgrading an existing one, adding a roof cricket is a smart investment in long-term durability and peace of mind.
Frequently Asked Questions
1. What is the main purpose of a roof cricket?
Its main purpose is to divert water away from chimneys or roof obstructions to prevent leaks.
2. Is a roof cricket necessary on all roofs?
No, it is most important on roofs with chimneys, skylights, or water-prone intersections.
3. What materials are used to build a roof cricket?
Common materials include wood framing, plywood, metal sheets, and shingles.
4. Can a roof cricket prevent leaks completely?
It significantly reduces leak risks but must be properly installed with correct flashing.
5. How long does a roof cricket last?
It typically lasts as long as the roof itself if built with durable materials and proper maintenance.
/ You May Also Read /
Gable vs Hip Roof: Which Roof Style Is Better for Your Home?
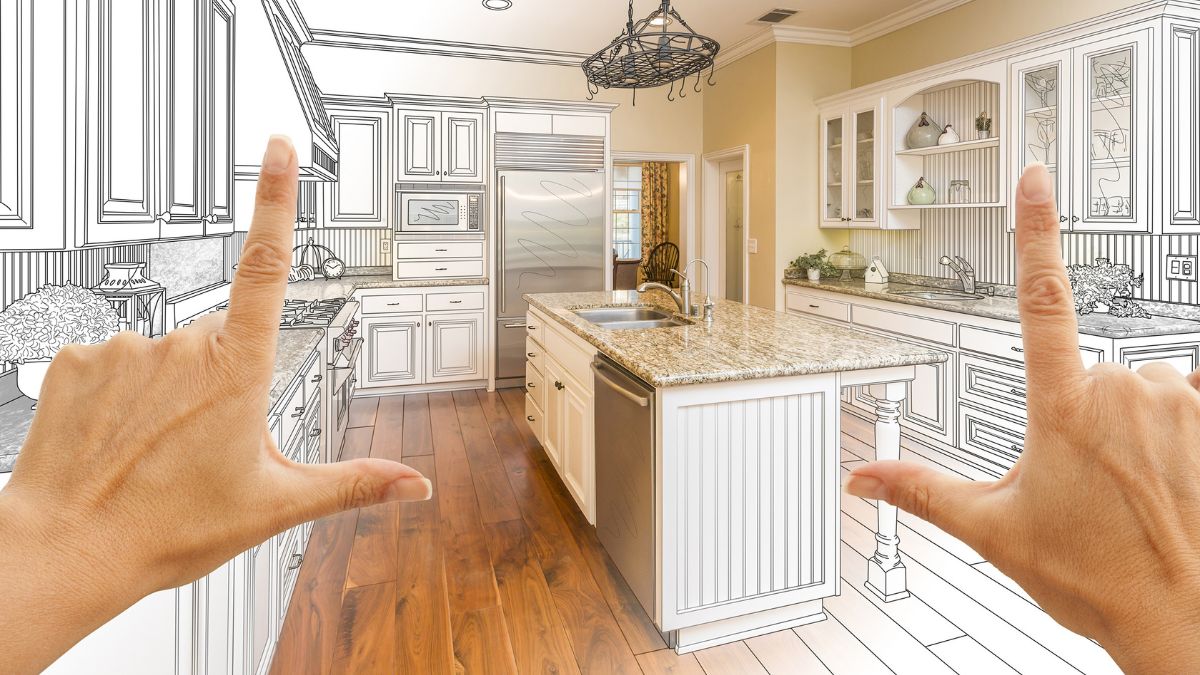
Looking for ways to refresh your space without emptying your savings? DIY home improvement projects give you exactly that power. You get to roll up your sleeves, learn a few new skills, and end up with a home that feels more like yours. The best part is that many of these updates cost far less than hiring pros and still deliver real visual and financial returns.
Most people start with the idea of “one weekend project” and end up discovering how satisfying it feels to transform a room themselves. Whether you want better storage, fresher colors, or a kitchen that finally works for your daily routine, the right projects make a noticeable difference.
Why DIY Home Improvement Projects Make Sense Right Now
Home prices and contractor rates keep climbing. Doing the work yourself cuts labor costs dramatically. You also gain control over materials, timelines, and the final look. Many updates even raise your home’s resale appeal when done carefully.
Beyond money, these projects build confidence. Completing a shelf installation or a fresh coat of paint teaches problem-solving that carries into other areas of life. Plus, you avoid the frustration of waiting weeks for a contractor who may or may not match your vision.
Easy DIY Home Improvement Projects for Beginners
Start simple so you build momentum instead of overwhelm. These ideas need basic tools and a free afternoon or weekend.
Paint an Accent Wall
Choose one wall in the living room or bedroom. Pick a color that contrasts nicely with the rest of the space. Clean the wall, tape the edges, and apply two coats. The change feels dramatic yet costs under fifty dollars in most cases.
Install Floating Shelves
Floating shelves add storage and style without taking up floor space. Use a stud finder, level, and sturdy brackets. Display books, plants, or framed photos. The result looks custom and instantly tidies cluttered surfaces.
Update Cabinet Hardware
Swap out old knobs and pulls on kitchen or bathroom cabinets. Measure carefully, choose a finish that matches your style, and install with a screwdriver. This five-dollar-per-piece upgrade refreshes the entire room.
Create a Gallery Wall
Gather frames of different sizes, print favorite photos or artwork, and arrange them on the floor first. Use a level and painter’s tape to mark positions before hanging. The finished wall feels personal and polished.
Intermediate Projects That Deliver Bigger Impact
Once you feel comfortable with the basics, step up to these higher-reward efforts.
Build a Simple Bookshelf or Storage Bench
Buy pre-cut lumber or have the hardware store cut boards to size. Follow a basic plan that uses pocket holes or simple butt joints. Sand, stain or paint, and assemble. You gain custom storage that fits your exact needs.
Refresh a Bathroom with a New Faucet and Lighting
Turn off the water supply, remove the old faucet, and install a modern single-handle model. Swap out the light fixture above the mirror for brighter LED options. These two changes make the bathroom feel newer without a full remodel.
Install Peel-and-Stick Backsplash
Choose a quality vinyl or composite tile product. Clean the wall thoroughly, measure carefully, and apply from the center outward. The finished look rivals traditional tile at a fraction of the cost and time.
Here is a quick comparison of popular starter and intermediate projects:
| Project Type | Skill Level | Average Cost | Time Required | Value Boost Potential |
|---|---|---|---|---|
| Accent wall paint | Beginner | $30–60 | 4–6 hours | High visual impact |
| Floating shelves | Beginner | $40–100 | 2–4 hours | Strong storage gain |
| Cabinet hardware update | Beginner | $50–150 | 2–3 hours | Instant kitchen refresh |
| Simple bookshelf | Intermediate | $80–200 | 1 weekend | Custom storage |
| Faucet + lighting refresh | Intermediate | $100–250 | 4–8 hours | Bathroom modernization |
| Peel-and-stick backsplash | Intermediate | $50–150 | 1 day | Kitchen or bath upgrade |
Planning Your DIY Home Improvement Projects the Smart Way
Success starts long before you pick up a tool. Measure twice, buy once remains the golden rule. Sketch the finished look or use free room-planning apps to test ideas. Check local building codes for any electrical or plumbing work. Even small projects benefit from a clear materials list and a realistic timeline.
Budget for unexpected needs. Add 15–20 percent extra for supplies. Keep receipts and take before-and-after photos. These records help if you later decide to sell the home.
Pros and Cons of Taking on DIY Home Improvement Projects
Pros
- Significant cost savings compared with hiring professionals
- Full creative control over design and materials
- Opportunity to learn practical skills
- Flexible schedule that fits your life
- Personal satisfaction from completing the work
Cons
- Time investment can stretch longer than expected
- Mistakes may cost money or require professional fixes
- Physical effort can be tiring
- Limited by existing skill level and tool access
- Some projects may lower resale value if done poorly
Common Mistakes That Derail DIY Efforts
Many people jump in without measuring carefully and end up with shelves that lean or paint that looks uneven. Skipping surface preparation is another frequent error. Dirty or glossy walls reject new paint. Using the wrong tools or cheap materials often leads to frustration and redo work.
Ignoring safety ranks high on the list of problems. Always wear eye protection, use a stable ladder, and shut off power when working near electrical outlets. Rushing the drying or curing time for adhesives and paint creates weak results that fail later.
Finally, overestimating skills causes trouble. Start with smaller tasks and build experience before tackling structural changes or complex electrical work.
Best Practices for Successful DIY Home Improvement Projects
Research thoroughly before buying materials. Read product reviews and watch a couple of reliable how-to videos. Gather every tool and supply before starting so you avoid mid-project store runs.
Work in good lighting and keep the space organized. Clean as you go. Take breaks to stay focused and avoid fatigue mistakes. When a step feels uncertain, pause and double-check instructions rather than guessing.
Document your process with photos. This habit helps you remember what worked and creates a portfolio of completed work. Celebrate small wins. Finishing one project well builds the confidence needed for the next.
For projects involving water or electricity, know your limits. Calling a licensed professional for those steps protects both your home and your safety while still letting you handle the surrounding improvements.
How to Choose Projects That Match Your Goals
Think about the rooms you use most. Kitchens and bathrooms usually deliver the strongest return on effort because they influence daily life and buyer perception. Focus on storage solutions if clutter frustrates you. Choose color and lighting updates if the home feels dated or dark.
Consider the season too. Painting and indoor carpentry work well year-round. Outdoor projects such as deck staining or garden beds fit warmer months better. Align the project size with available free time so progress feels steady rather than stressful.
Long-Term Benefits Beyond the Immediate Update
Completed DIY work often inspires further improvements. A freshly painted room may push you to update furniture or lighting next. Over time these small changes accumulate into a home that reflects your taste and functions better for your family.
Well-executed projects also teach budgeting, planning, and problem-solving. Those skills transfer to larger life goals. Many homeowners discover they enjoy the process enough to tackle bigger renovations later or even help friends with their own updates.
Conclusion
DIY home improvement projects offer a practical path to a more comfortable, attractive, and valuable home. By starting with manageable tasks, planning carefully, and following proven practices, you avoid common pitfalls and enjoy genuine results. The combination of cost savings, personal satisfaction, and visible transformation makes the effort worthwhile. Pick one project that excites you, gather the right supplies, and begin. Your home will thank you.
/ You May Also Read /
Roofing Cop: What It Means, How It Works, and Why Property Owners Use Roofing Advocacy Services
HOME IMPROVEMENT
Home Improvement News Today: Fresh Trends, Tips & Must-Know Updates for Your Next Project

Home improvement news today is moving faster than ever. Homeowners are chasing smarter upgrades, lower energy bills, and spaces that actually feel good to live in. Whether you are planning a full kitchen overhaul or just refreshing a bathroom, staying current helps you avoid outdated choices and costly mistakes.
The latest updates center on practical changes that deliver real results—better materials, smarter technology, and design choices that hold value. Let’s break down what is happening right now and how you can use it.
Why Home Improvement News Today Matters for Everyday Homeowners
Keeping up with current developments protects your investment. New building codes, material innovations, and shifting buyer preferences all affect what projects make sense.
Right now, three forces dominate the conversation: rising material costs in some categories, strong demand for energy efficiency, and a clear preference for multi-functional spaces. Understanding these trends helps you prioritize projects that deliver both comfort and long-term value.
Current Market Snapshot
Material prices have stabilized in several key areas after earlier spikes. Lumber and certain metals remain elevated in some regions, while engineered wood products and recycled materials offer more predictable pricing. Labor availability continues to vary by location, so timing your project carefully still matters.
Top Home Improvement Trends Making Headlines Right Now
Several clear patterns stand out in recent reports and industry updates.
Sustainable and Low-Maintenance Materials
Homeowners increasingly choose materials that last longer and require less upkeep. Quartz and porcelain surfaces continue to replace traditional marble in kitchens and baths. Engineered hardwood and luxury vinyl plank flooring remain popular for their durability and water resistance.
Exterior projects favor fiber-cement siding and composite decking. These options resist weather damage better than many older materials and often come with longer warranties.
Smart Home Integration That Actually Works
Smart technology has moved past novelty. Reliable systems for lighting, thermostats, security, and water leak detection now integrate more smoothly. Voice control and app-based management are standard expectations rather than extras.
Many newer products focus on energy monitoring. Seeing real-time usage helps households cut waste without sacrificing comfort.
Flexible Living Spaces
Open-concept layouts are evolving. People still want connection between rooms, but they also want the ability to close off areas when needed. Pocket doors, sliding barn doors, and multi-purpose furniture help create adaptable rooms that serve work, relaxation, and entertainment.
Basement and attic conversions remain strong. These projects add usable square footage without expanding the footprint of the house.
Practical Project Ideas Backed by Current News
Here are several project types gaining attention because they balance cost, impact, and future value.
Kitchen and Bath Refreshes
Full gut renovations are expensive. Many homeowners now focus on high-impact updates: new countertops, cabinet refacing or painting, updated lighting, and modern fixtures. These changes can transform the look and function of a room without the disruption of a complete rebuild.
Water-efficient faucets and dual-flush toilets continue to appear in news coverage because they lower utility bills and meet stricter local codes in many areas.
Outdoor Living Expansions
Patios, decks, and covered outdoor kitchens remain popular. Composite materials and modular furniture make these spaces easier to maintain. Adding outdoor lighting and ceiling fans extends usable hours and improves comfort.
Energy Efficiency Upgrades
Windows, insulation, and HVAC improvements frequently top lists of smart investments. Newer window technologies reduce heat transfer while improving noise control. Proper attic and wall insulation often delivers noticeable comfort gains and lower heating and cooling costs.
| Project Type | Typical Payback Period | Key Benefit | Current Material Trend |
|---|---|---|---|
| Kitchen countertop upgrade | 5–8 years | Higher daily usability | Quartz & porcelain |
| Window replacement | 7–12 years | Lower energy bills | Double- or triple-pane low-E |
| Composite decking | 8–10 years | Reduced maintenance | Capstock composites |
| Smart thermostat install | 1–3 years | Immediate energy savings | Learning algorithms |
| Bathroom fixture update | 4–7 years | Better water efficiency | WaterSense certified |
This table highlights projects that currently offer solid returns based on common industry estimates. Actual results depend on local climate, utility rates, and quality of installation.
Pros and Cons of Jumping on Current Trends
Every trend has trade-offs. Understanding them helps you decide what fits your situation.
Pros
- Newer materials often last longer and need less maintenance.
- Energy upgrades can lower monthly bills and improve comfort quickly.
- Flexible spaces adapt better to changing family needs.
- Smart features increase convenience and can raise resale appeal.
Cons
- Some popular materials carry higher upfront costs.
- Complex smart systems may require professional installation and occasional updates.
- Trends can shift; what feels modern today may look dated in ten years.
- Labor shortages in certain areas can delay projects and raise costs.
Balancing these factors against your budget and timeline remains essential.
Common Mistakes Homeowners Make When Following Home Improvement News Today
Even motivated homeowners slip up. Here are frequent errors and how to avoid them.
- Chasing every new product without checking long-term performance data.
- Underestimating the total cost of a project, including permits, disposal, and unexpected repairs.
- Skipping proper preparation—poor surface prep ruins even the best paint or flooring.
- Ignoring local building codes or HOA rules that can force costly changes later.
- Hiring based only on the lowest bid instead of checking references, licenses, and insurance.
Taking time to research and plan reduces the chance of expensive do-overs.
Best Practices for Using the Latest Home Improvement News
Follow these practical steps to turn current information into successful projects.
- Start with a clear priority list ranked by need, budget, and expected impact.
- Verify material claims with independent reviews and warranty details.
- Get multiple quotes and ask contractors about their experience with the specific materials you want.
- Plan for contingencies—set aside 10–15% of the budget for surprises.
- Document everything: contracts, receipts, and product specifications.
- Consider sequencing projects so that one upgrade supports the next (for example, insulation before new HVAC).
| Best Practice | Why It Matters | Quick Action Step |
|---|---|---|
| Research material warranties | Protects long-term investment | Check manufacturer sites and reviews |
| Obtain detailed written quotes | Prevents scope creep and surprise fees | Request itemized estimates |
| Schedule around weather and seasons | Reduces delays and material issues | Avoid peak summer for exterior work |
| Test products in small areas first | Confirms appearance and performance | Order samples before full purchase |
| Keep records organized | Helps with future maintenance or sale | Create a simple digital project folder |
These habits turn information into reliable results.
How to Stay Updated Without Feeling Overwhelmed
You do not need to track every headline. Focus on a few trusted sources: local building department notices, reputable trade publications, and manufacturer updates on products you already use. Set aside a short monthly check-in rather than constant scrolling.
When a new material or system catches your attention, ask three questions: Does it solve a real problem in my home? Is the cost justified by the benefits? Can I maintain or service it easily?
Conclusion
Home improvement news today offers useful guidance if you approach it with a clear plan. Focus on durable materials, practical smart technology, and flexible spaces that match how you actually live. Avoid chasing every trend. Instead, match updates to your needs, budget, and local conditions.
Start small if needed—refresh one room or upgrade one system—and build from there. Careful choices today create a more comfortable, efficient, and valuable home tomorrow.
/ You May Also Read /
Roof Sheathing: Complete Guide to Types, Materials, Costs, Installation, and Maintenance
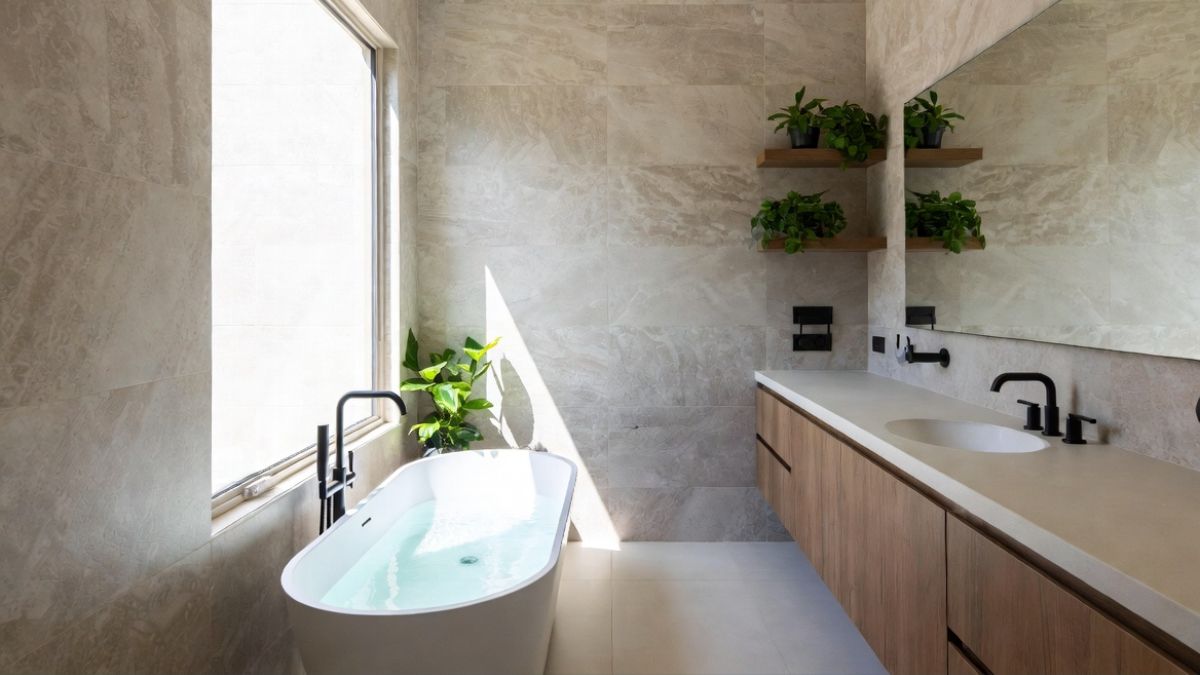
When you step into your bathroom each morning, it should energize you rather than feel like just another chore on the list. That’s exactly why so many homeowners are diving into bathroom remodel ideas right now. Whether you’re working with a tiny powder room or a spacious primary suite, a thoughtful update can completely transform how you experience one of the most-used spaces in your home.
In 2026, bathroom designs lean into warmth, texture, and personal comfort. Forget cold minimalism—think natural materials, smart storage, and spa-like retreats that actually feel good to linger in. This guide walks you through practical, inspiring ideas that balance style, function, and budget so you can create a bathroom you’ll truly love.
Why a Bathroom Remodel Makes Sense Right Now
Bathrooms take a beating from daily use, moisture, and time. Remodeling isn’t just about looks; it boosts your home’s value and daily comfort. Modern updates often improve water efficiency, add better lighting, and create storage that actually works.
Homeowners report higher satisfaction after focusing on wellness features like larger showers or soothing color schemes. Plus, with resale in mind, updated bathrooms rank among the top projects that deliver strong returns.
Popular Bathroom Remodel Ideas for Small Spaces
Small bathrooms don’t have to feel cramped. Smart choices open up the room visually and functionally.
Start with a floating vanity. It frees up floor space and creates an airy feel while offering storage below. Pair it with a wall-mounted toilet for even more openness.
Consider a walk-in shower instead of a tub-shower combo. Frameless glass doors and built-in niches keep things sleek and practical. Use light-colored tiles or microcement to reflect light and make the space feel larger.
Vertical storage shines here. Tall, narrow cabinets or recessed shelving maximize walls without eating floor space. Mirrors with integrated lighting double as both functional and decorative elements.
Table: Space-Saving Bathroom Remodel Ideas
| Idea | Benefit | Best For | Approximate Cost Impact |
|---|---|---|---|
| Floating Vanity | Maximizes floor space | Small to medium baths | Medium |
| Frameless Glass Shower | Creates open, seamless look | Any small bathroom | Higher |
| Recessed Niches | Built-in storage without bulk | Showers and walls | Low |
| Large Mirror with Lights | Enhances brightness | Powder rooms | Low to Medium |
These choices prove you don’t need square footage to achieve big style.
Luxury Bathroom Remodel Ideas That Feel Like a Spa
If budget allows, go for that resort-at-home vibe. A freestanding soaking tub becomes a statement piece, especially positioned near a window with views or soft lighting.
Incorporate natural stone like honed marble or travertine for walls and floors. These materials add texture and warmth that porcelain can’t match. Layered lighting—overhead, sconces, and accent strips—lets you adjust the mood from energizing to relaxing.
Heated floors and towel warmers elevate everyday routines. Smart mirrors with built-in displays or voice controls add modern convenience without clutter.
Statement fixtures matter too. Sculptural faucets in matte black or brushed gold pair beautifully with neutral palettes accented by soft greens or warm woods.
Budget-Friendly Bathroom Remodel Ideas
You don’t need to spend a fortune to see dramatic changes. Focus on high-impact, lower-cost updates first.
Paint or refinish cabinets instead of replacing them entirely. New hardware in modern finishes instantly refreshes the look. Replace outdated lighting with energy-efficient LED fixtures that brighten the space.
Update countertops with quartz or laminate that mimics stone. Swap old fixtures for water-saving models that look premium. Peel-and-stick tiles or affordable ceramic options create big visual impact in showers.
Shop during sales or choose versatile pieces that work across trends. Many homeowners achieve beautiful results by refreshing surfaces and adding thoughtful accessories rather than gutting the entire room.
Choosing Materials and Fixtures for Longevity
Material selection determines how well your remodel holds up. Porcelain and ceramic tiles resist moisture beautifully and come in endless styles. Natural stone offers luxury but requires sealing.
For vanities, look for moisture-resistant options like solid wood with proper finishes or engineered wood. Faucets and showers in matte finishes hide water spots better than shiny chrome.
Table: Material Comparison for Bathroom Remodels
| Material | Durability | Maintenance | Style Versatility | Cost Range |
|---|---|---|---|---|
| Porcelain Tile | Excellent | Low | High | Affordable |
| Natural Stone | Good | Medium | High | Premium |
| Quartz Counter | Excellent | Very Low | Medium-High | Medium |
| Matte Fixtures | Good | Low | Contemporary | Medium |
Prioritize quality where it counts most, like in high-traffic areas.
Color Schemes and Lighting That Transform the Space
Warm neutrals dominate 2026 trends. Greige, soft beiges, and gentle earth tones create calming backdrops. Add personality with accent tiles in terracotta or soft blues.
Lighting layers make all the difference. Combine ambient ceiling lights, task lighting around mirrors, and accent lights to highlight textures. Dimmable options let you control the atmosphere perfectly.
Pros and Cons of Different Bathroom Remodel Approaches
Every project has trade-offs. Full gut remodels offer the most customization but come with higher costs and longer timelines. Partial refreshes deliver quick wins on a tighter budget but may limit long-term changes.
Pros of a Full Remodel:
- Complete customization
- Modern efficiency upgrades
- Higher resale value boost
Cons:
- Higher cost and disruption
- Longer project time
Pros of Cosmetic Updates:
- Faster and more affordable
- Less mess
- Easy to test new styles
Cons:
- May not address underlying issues
- Limited structural changes
Weigh your goals, timeline, and budget carefully before deciding.
Common Mistakes to Avoid in Your Bathroom Remodel
Many homeowners rush into trendy choices without considering daily use. All-white everything looks stunning in photos but shows every speck of dirt and feels cold in real life.
Skipping proper ventilation leads to mold and moisture problems down the line. Ignoring storage needs creates clutter that undermines your beautiful new design.
Choosing style over function, like tiny showers that feel cramped during use, disappoints quickly. Always test layouts and fixtures in person when possible.
Overlooking resale considerations can hurt you later. While personal style matters, extremely bold choices may limit buyer appeal.
Best Practices for a Successful Bathroom Remodel
Plan thoroughly before starting. Measure multiple times and create a realistic budget that includes 10-20% contingency for surprises.
Work with professionals for plumbing and electrical work. Hire a designer if your vision feels overwhelming—they often save money by preventing costly mistakes.
Focus on timeless elements with trendy accents that you can easily update later. Prioritize quality fixtures in high-use areas.
Maintain good communication with your contractor and visit the site regularly. Document everything with photos for reference.
Table: Best Practices Checklist
| Phase | Key Actions | Why It Matters |
|---|---|---|
| Planning | Set budget, priorities, timeline | Prevents overspending |
| Design | Layer lighting, test storage | Ensures daily usability |
| Execution | Quality materials in key areas | Longevity and satisfaction |
| Finishing | Add plants, textiles, accessories | Personalizes the space |
Conclusion
Bathroom remodel ideas open endless possibilities to create a space that works beautifully and feels like your personal sanctuary. Whether you choose small-space solutions, luxury spa features, or smart budget updates, focus on what improves your daily life most.
Take time to explore options, gather inspiration, and plan thoughtfully. Your updated bathroom will reward you every single day with comfort, style, and function that lasts for years.
Ready to start your project? The right choices today create the bathroom of your dreams tomorrow.
/ You May Also Read /
Roof Sheathing: Complete Guide to Types, Materials, Costs, Installation, and Maintenance
-

 HOME IMPROVEMENT2 months ago
Roofing Cop: What It Means, How It Works, and Why Property Owners Use Roofing Advocacy Services
-

 HOME IMPROVEMENT2 months ago
Roof Sheathing: Complete Guide to Types, Materials, Costs, Installation, and Maintenance
-

 HOME IMPROVEMENT2 months ago
Roof Decking: Complete Guide to Materials, Installation, Costs, and Maintenance
-

 HOME IMPROVEMENT2 months ago
How Long Does a Roof Last? A Complete Guide to Roof Lifespan and Replacement
-

 HOME IMPROVEMENT2 months ago
Roof Drip Edge Flashing: Complete Guide to Installation, Benefits, Costs, and Best Practices
-

 HOME IMPROVEMENT2 months ago
Gable vs Hip Roof: Which Roof Style Is Better for Your Home?
-

 HOME IMPROVEMENT2 months ago
The Complete Guide to Roofing Shoes: Safety, Grip, and Performance on Every Roof
-

 HOME IMPROVEMENT2 months ago
Ridge Vent Roof: Complete Guide to Better Attic Ventilation, Energy Efficiency, and Roof Protection