
TOPIC
Long Run Steel Roofing: Benefits, Installation Tips & Buying Guide

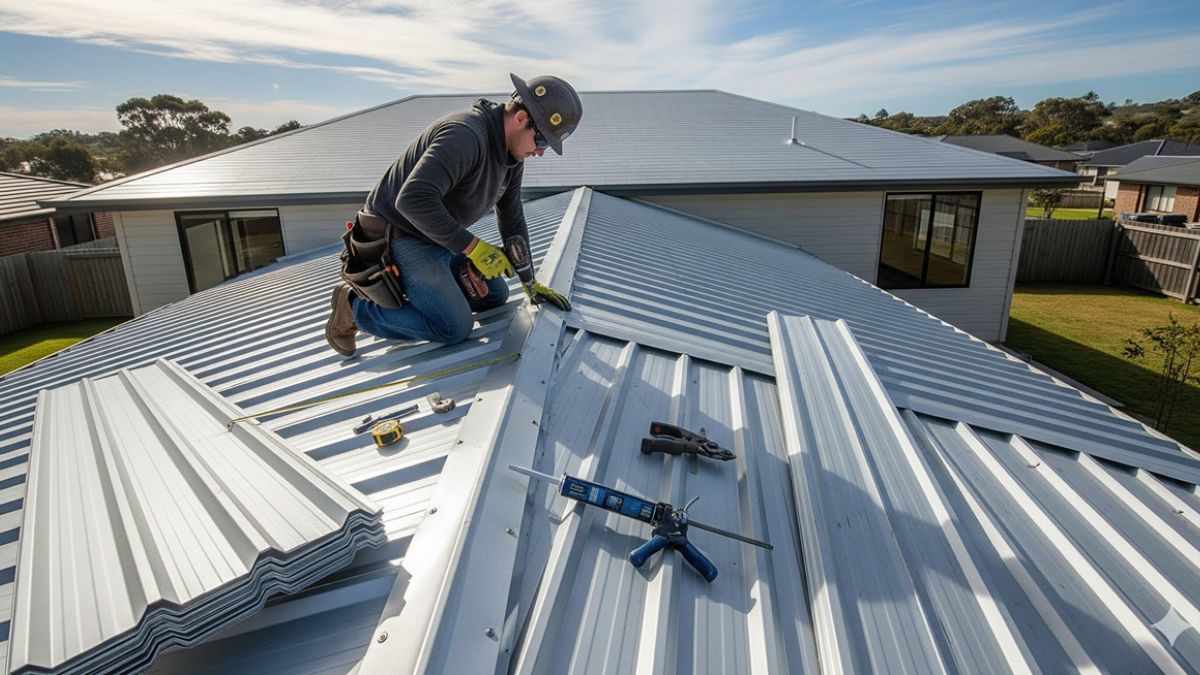
Long run steel roofing has become one of the most popular choices for homeowners and builders who want a tough, clean-looking, and long-lasting roof. Unlike traditional short-sheet metal roofs that need frequent joins, long run steel roofing uses continuous lengths of steel formed into panels that can stretch from ridge to eave with almost no seams. This simple change delivers better weather performance, fewer leak points, and a sharper finished appearance.
If you are planning a new build or a roof replacement, understanding how this system works will help you make a smarter decision.
What Exactly Is Long Run Steel Roofing?
Long run steel roofing refers to steel sheets that are roll-formed on site or supplied in continuous lengths far longer than standard sheets. Most residential projects use panels between 6 and 20 metres, depending on the roof design and transport limits. The steel itself usually carries a protective coating such as Zincalume or Colorsteel-type finishes that resist corrosion and fading.
The continuous nature of the sheets means fewer end-laps. Fewer joins equal fewer opportunities for water to enter. That is the core advantage.
Why Homeowners Choose Long Run Steel Roofing
Homeowners pick this system for several practical reasons.
First, the seamless look gives a modern, streamlined appearance that suits both contemporary and traditional homes. Second, the reduced number of joints improves weather tightness. Third, the material is lightweight compared with concrete tiles yet extremely strong when correctly fixed.
Durability stands out as another major benefit. Quality long run steel roofing can last 30 to 50 years or more when the correct coating and maintenance schedule are followed. It also handles high winds, heavy rain, and hail better than many alternative materials.
Key Advantages and Limitations
Here is a clear comparison of the main strengths and trade-offs:
| Aspect | Advantages | Limitations |
|---|---|---|
| Weather Resistance | Fewer joins reduce leak risk | Needs correct pitch and fixings |
| Appearance | Clean continuous lines | Visible oil canning if panels are too wide |
| Weight | Lightweight, easier on structure | Can amplify noise in heavy rain without insulation |
| Lifespan | 30–50+ years with good coatings | Coastal areas require higher-grade coatings |
| Installation Speed | Faster on larger roofs | Requires specialised equipment for long lengths |
| Cost | Competitive over the long term | Higher upfront cost than basic short sheets |
This table shows why many people consider long run steel roofing a smart long-term investment despite the slightly higher initial outlay.
How Long Run Steel Roofing Is Installed
Installation differs from short-sheet systems. The process usually follows these steps:
- Measure the exact roof lengths carefully.
- Order or form panels to those precise lengths.
- Prepare the roof structure with correct purlin spacing.
- Install underlayment and any required insulation.
- Lift and position the continuous panels.
- Fix them with the recommended screws and washers.
- Seal any necessary penetrations properly.
- Install flashings, barge, and ridge capping.
Because the sheets are long, handling and transport need extra care. Professional installers use specialised lifting gear and follow manufacturer fixing patterns to prevent oil canning (visible waviness) and ensure wind resistance.
Choosing the Right Profile and Coating
Not every profile suits every roof. Popular options include corrugated, trapezoidal, and standing-seam styles. Corrugated remains common for traditional looks, while trapezoidal profiles often perform better in high-wind zones.
Coating choice matters just as much. Standard Zincalume works well inland. In coastal or industrial areas, thicker metallic coatings or advanced paint systems give better protection against salt and pollution.
Colour selection also affects performance. Lighter colours reflect more heat, which can lower cooling costs in hot climates.
Common Mistakes to Avoid
Many roof problems start with avoidable errors. Watch out for these:
- Ordering panels slightly short, forcing unnecessary joins.
- Using incorrect screw types or spacing.
- Skipping proper underlayment in high-rainfall regions.
- Ignoring thermal expansion and contraction.
- Choosing a coating grade too low for the local environment.
- Allowing foot traffic on the roof without walk boards.
Fixing these mistakes after installation becomes expensive. Getting the details right the first time saves money and stress.
Best Practices for Longevity
Follow these practical steps to get the maximum life from your long run steel roofing:
- Clean the roof once or twice a year to remove leaves, dirt, and salt deposits.
- Inspect flashings and fixings after major storms.
- Keep gutters and downpipes clear so water flows away freely.
- Avoid walking on the roof whenever possible.
- Touch up any scratches promptly with the correct repair paint.
- Ensure adequate ventilation in the roof space to reduce condensation.
These simple habits can add years to the service life of the roof.
Cost Factors and Value Over Time
The price of long run steel roofing depends on sheet thickness, coating type, colour, profile, and roof complexity. While the material itself costs more than basic short sheets, labour savings on larger roofs and the extended lifespan often make the total cost of ownership lower.
When comparing quotes, look beyond the square-metre rate. Ask about the coating warranty, the thickness of the steel, and whether the installer follows the manufacturer’s fixing schedule. A cheaper roof that fails early is never a bargain.
Practical Examples in Real Projects
On a typical single-storey family home with a simple gable roof, continuous panels running from ridge to gutter create a neat, modern appearance and cut the number of end-laps dramatically. In multi-level homes or those with complex roof shapes, installers still use the longest practical lengths and carefully plan the layout to minimise joins.
Agricultural buildings and commercial sheds also benefit. Long continuous runs speed up installation and reduce the chance of leaks over large spans.
Environmental and Energy Considerations
Modern long run steel roofing often contains a high percentage of recycled content and is fully recyclable at the end of its life. Reflective coatings can lower roof temperatures, which helps reduce air-conditioning demand. When paired with good insulation, the system contributes to a more energy-efficient home.
Making the Final Decision
Long run steel roofing suits most residential and light commercial projects where a durable, low-maintenance, and attractive roof is needed. It performs especially well on simple roof shapes that allow long continuous panels. For very complex roofs or heritage-style homes that demand a different aesthetic, other materials may still be preferable.
Speak with a reputable supplier and installer who understands local conditions. Request samples of the actual coating and profile you are considering. Check recent local projects so you can see how the system looks and performs in real weather.
Conclusion
Long run steel roofing delivers a combination of strength, weather resistance, and clean design that few other roofing materials can match. By choosing the right profile, coating, and installer, and by following basic maintenance, you can enjoy a reliable roof for decades. Whether you are building new or replacing an ageing roof, this system deserves serious consideration for its long-term performance and appearance.
/ You May Also Read /
DIY Home Improvement Projects That Actually Boost Your Home’s Value
TOPIC
Jerry’s Home Improvement: Your Trusted Local Partner for Quality Projects and Everyday Savings

Walking into Jerry’s Home Improvement feels different from the big national chains. The place has that solid, local energy where people actually know their products and take time to help. For decades, homeowners in the Eugene and Springfield area have headed to Jerry’s Home Improvement when they need reliable materials, fair prices, and real advice that makes projects go smoother.
Whether you are planning a full kitchen remodel, fixing a fence, or just grabbing supplies for a weekend paint job, this employee-owned store has built a reputation for selection, value, and service that keeps customers coming back.
Why Jerry’s Home Improvement Stands Out from the Crowd
Most big-box stores feel the same. Jerry’s offers something more personal. Founded in 1961 by Jerry and Merle Orem, the business started small and grew into two large locations with hundreds of team members. Today it is 100 percent employee-owned, which shows in the way people treat customers and care about the work.
The stores carry everything from lumber and tools to kitchen cabinets, flooring, paint, lighting, and outdoor living products. You will also find free services that many places skip, such as kitchen design help, deck estimates, and custom paint matching.
Here is a quick comparison that helps many shoppers decide:
| Feature | Jerry’s Home Improvement | Typical National Chain |
|---|---|---|
| Ownership | 100% employee-owned | Corporate shareholders |
| Price Match | Matches any competitor | Limited or none |
| Free Design Services | Kitchen, deck, fence estimates | Often limited or paid |
| Local Knowledge | Deep Oregon climate expertise | Generic national advice |
| Community Focus | Supports local housing and kids | National charity programs |
This table highlights why so many locals choose Jerry’s for both big and small projects.
Popular Project Types Customers Tackle at Jerry’s
People come in with all kinds of plans. Some of the most common projects include:
- Kitchen and bath remodels using cabinets, countertops, and fixtures available in-store
- Outdoor living upgrades such as decks, fences, and patio materials
- Flooring installations ranging from luxury vinyl to hardwood refinishing
- Painting and interior updates with custom color matching
- Tool purchases and small repairs using the extensive hardware selection
The staff can help you figure out quantities, recommend the right products for the Pacific Northwest weather, and even cut materials to size while you wait.
Pros and Cons of Shopping at Jerry’s Home Improvement
Every place has strengths and a few limitations. Here is an honest look:
Pros
- Competitive everyday prices with a solid price-match guarantee
- Wide product selection under one roof, including a large garden center and drive-through lumber yard
- Knowledgeable team members who take time to answer questions
- Free design and estimate services that save money and reduce mistakes
- Strong community roots and employee ownership culture
Cons
- Only two physical locations, so shoppers outside the Eugene-Springfield area need to plan a trip
- Peak weekend hours can get busy, though the space is large
- Some specialty items may require special order, just like any retailer
Overall, the advantages outweigh the drawbacks for most local homeowners.
Common Mistakes Homeowners Make (and How to Avoid Them)
Even experienced DIYers run into trouble. Here are frequent errors people make when planning home improvement work:
- Underestimating material quantities – Always buy a little extra. Staff at Jerry’s can help calculate waste factors for flooring or lumber.
- Choosing products that do not suit the climate – Oregon’s rain and temperature swings demand moisture-resistant materials. Ask for recommendations.
- Skipping the design phase – Free kitchen and deck design services exist for a reason. Use them.
- Ignoring proper tools – Buying cheap tools often costs more in the long run. The tool department is well stocked for a reason.
- Forgetting permits and codes – Check local requirements before starting structural work. Team members can often point you in the right direction.
Avoiding these pitfalls saves time, money, and frustration.
Best Practices for Successful Projects with Jerry’s Home Improvement
Follow these practical steps and your next project will go more smoothly:
- Start with a clear plan and bring photos or rough sketches when you visit.
- Take advantage of free design services early.
- Ask about current sales and the price-match policy.
- Measure carefully and double-check with staff.
- Schedule bigger jobs during the week when the store is quieter.
- Keep the receipt and contact information for the associate who helped you. Many customers appreciate the follow-up support.
A simple project planning framework many customers use looks like this:
| Stage | Key Actions | Helpful Jerry’s Resource |
|---|---|---|
| Planning | Measure, set budget, gather ideas | Free design consultations |
| Product Selection | Choose materials and finishes | In-stock samples and experts |
| Purchase | Compare prices, check guarantees | Price match and bulk options |
| Installation | DIY or hire pros | Tool rental and how-to advice |
| Finish & Maintain | Clean up, protect the investment | Maintenance products and tips |
This breakdown keeps projects organized from start to finish.
Real-World Examples of Projects Done Right
One local couple walked in with plans for a small kitchen refresh. The design team helped them select cabinets and a quartz countertop that fit their budget. They used the price-match guarantee on the flooring and finished the project under their original estimate.
Another homeowner needed a new deck. After a free estimate, they bought pressure-treated lumber and composite railing materials recommended for the wet climate. The project lasted years longer than their previous untreated wood deck.
These everyday success stories show how the combination of selection, service, and local knowledge makes a real difference.
Conclusion
Jerry’s Home Improvement has earned its place as a trusted destination for homeowners who want quality materials, honest pricing, and helpful service. From its employee-owned culture to the free design help and everyday low prices, the store supports both weekend warriors and serious remodelers. Next time a project comes up, head to Jerry’s and experience the difference that local knowledge and genuine care can make.
/ You May Also Read /
Roofing Nail Gun Guide: Types, Uses, Safety Tips, and How to Choose the Best One
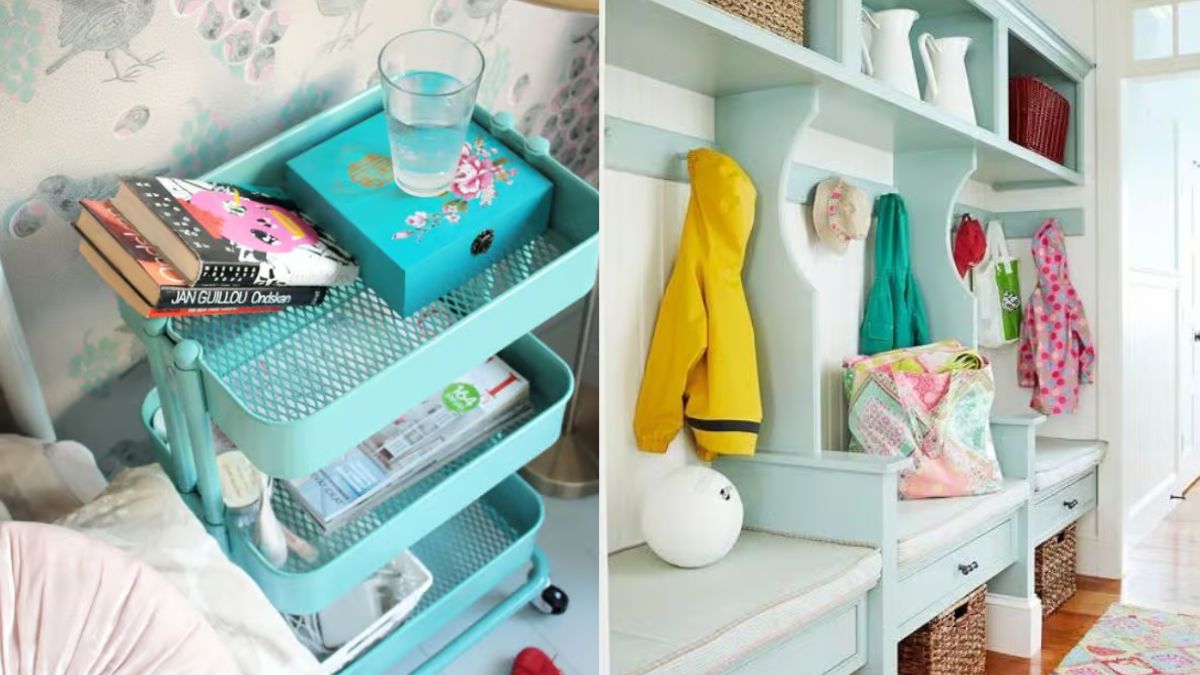
Feeling buried under clutter and half-finished tasks is more common than most people admit. Organization hacks can turn that daily chaos into a system that actually works with your real life instead of against it. The right small changes free up mental space, cut decision fatigue, and make everything feel lighter.
Most of us don’t need more storage bins. We need smarter habits that stick even on busy weeks. Below you’ll find practical, tested strategies that go beyond the usual “buy more containers” advice.
Why Most Organization Efforts Fail
People often treat organization like a one-time deep clean. They spend a weekend sorting everything, feel great for three days, then watch the mess return. The problem is rarely motivation. It’s the lack of systems that match how you actually live.
Good organization reduces the number of decisions you make every day. When everything has a clear home and a simple rule, your brain stops working overtime just to find the scissors or remember which bills are due.
The 5-Minute Reset Rule
One of the most effective organization hacks is the five-minute reset. At the end of each day, set a timer and put everything back where it belongs. No deep cleaning. Just reverse the day’s small messes.
This single habit prevents clutter from compounding. A kitchen counter that gets cleared every evening stays usable. A desk that gets wiped and stacked each night greets you with calm instead of guilt the next morning.
Pair it with a “closing shift” mindset. Think of yourself as the last employee locking up the store. Once the five minutes are done, you’re free.
Zone Your Spaces Instead of Organizing Everything
Trying to organize an entire house or office at once usually leads to burnout. Break your environment into zones.
- Entry zone: keys, bags, mail, shoes
- Work zone: laptop, chargers, notebooks, active projects
- Kitchen command center: calendar, shopping list, frequently used tools
- Relaxation zone: remote controls, chargers, reading materials
Assign each zone a maximum of three to five core items that live there. Everything else gets a temporary home or gets removed. When a zone stays consistent, the rest of the space feels more controlled even if other areas still need work.
| Zone | Core Items Only | Daily Habit | Weekly Check |
|---|---|---|---|
| Entry | Keys, bag, shoes, mail sorter | Empty pockets & hang bag | Clear old mail |
| Desk | Laptop, notebook, pen, charger | Clear surface before leaving | Archive finished papers |
| Kitchen | Calendar, list pad, utensil crock | Wipe counters after cooking | Restock list supplies |
| Bedroom | Phone charger, book, water glass | Make bed & clear nightstand | Rotate laundry basket |
Digital Organization Hacks That Save Hours
Physical clutter is only half the battle. Digital mess creates just as much stress.
Start with a single inbox rule for email and files. Everything new lands in one place. Process it daily using a simple three-step filter: delete, do, or defer. If an email takes under two minutes, handle it immediately. Otherwise move it to a dated folder or task list.
Name files with a consistent format: Year-Month-Project-Description. Example: 2026-07-Budget-Q3-Review. This makes search almost effortless later.
Cloud folders work best when limited. Create only four top-level folders: Active, Archive, Reference, and Personal. Everything else lives inside those. Review the Active folder every Friday and move finished items to Archive.
The One-In, One-Out Rule for Stuff
Every time a new item enters your home or workspace, one similar item must leave. Buy a new sweater? Donate or sell an old one. Receive a new kitchen gadget? Choose something that hasn’t been used in six months to give away.
This rule stops accumulation without requiring constant decluttering sessions. It also forces a quick decision at the moment of purchase, which is far easier than sorting through drawers later.
Visual Labels and Clear Containers
Opaque boxes hide problems. Clear containers and simple labels make the system self-maintaining. When you can see what’s inside and the label tells you exactly what belongs there, putting things away becomes automatic.
Use the same label style everywhere—black text on white, or a consistent color for categories. Consistency reduces the mental effort needed to maintain order.
Time-Blocking for Maintenance
Organization is not a project. It’s ongoing maintenance. Schedule two short blocks each week: one 20-minute session for physical spaces and one for digital files.
Treat these blocks like any other appointment. When the time arrives, you simply execute the known routine instead of deciding what needs attention. Over time the maintenance becomes almost invisible.
Pros and Cons of Popular Organization Approaches
Different methods suit different personalities. Here’s a quick comparison of three common approaches:
| Approach | Pros | Cons | Best For |
|---|---|---|---|
| KonMari (spark joy) | Emotional clarity, lasting decisions | Time-intensive upfront | People who feel attached to objects |
| Minimalist caps | Fast results, less decision fatigue | Can feel restrictive | Those who hate clutter |
| Zone + Reset system | Flexible, sustainable, low pressure | Requires daily consistency | Busy households and professionals |
Common Mistakes That Undo Your Progress
Avoid these frequent traps:
- Buying organizers before decluttering. Containers just rearrange the excess.
- Creating systems that require too many steps. If putting something away takes more than ten seconds, it won’t happen consistently.
- Ignoring the “landing spots.” Keys, phones, and bags need designated places near the door. Without them, clutter starts immediately.
- Trying to organize other people’s stuff without agreement. Shared spaces need shared rules.
- Over-labeling or over-complicating categories. Too many folders or bins create new decision points.
The biggest mistake is treating organization as a personality trait instead of a set of habits. Anyone can improve with the right systems.
Best Practices That Keep Systems Alive
- Start with the space you use most every day. Success there builds momentum.
- Keep tools visible and within reach of the task. A label maker that lives in a drawer rarely gets used.
- Review your system every three months. Life changes; your organization should too.
- Use the two-minute rule aggressively. If it can be done quickly, do it now.
- Celebrate small wins. A clear kitchen counter for a full week is worth noticing.
- Build in flexibility. Leave 10–20% empty space in drawers and shelves so the system can breathe.
- Pair new habits with existing ones. Reset the desk while the coffee brews. Sort mail while waiting for dinner to cook.
These practices turn temporary order into a default state.
How to Start This Week
Pick one zone and one digital area. Apply the five-minute reset and the one-in-one-out rule for seven days. Track how much mental energy you recover. Most people notice the difference by day three.
Once those two areas feel stable, expand outward. Organization compounds. Small consistent actions create more free time and less stress than any weekend purge ever could.
The goal is never a perfect Instagram home. The goal is a life that runs with less friction so you can focus on what actually matters.
/ You May Also Read /
Roofing Nail Gun Guide: Types, Uses, Safety Tips, and How to Choose the Best One
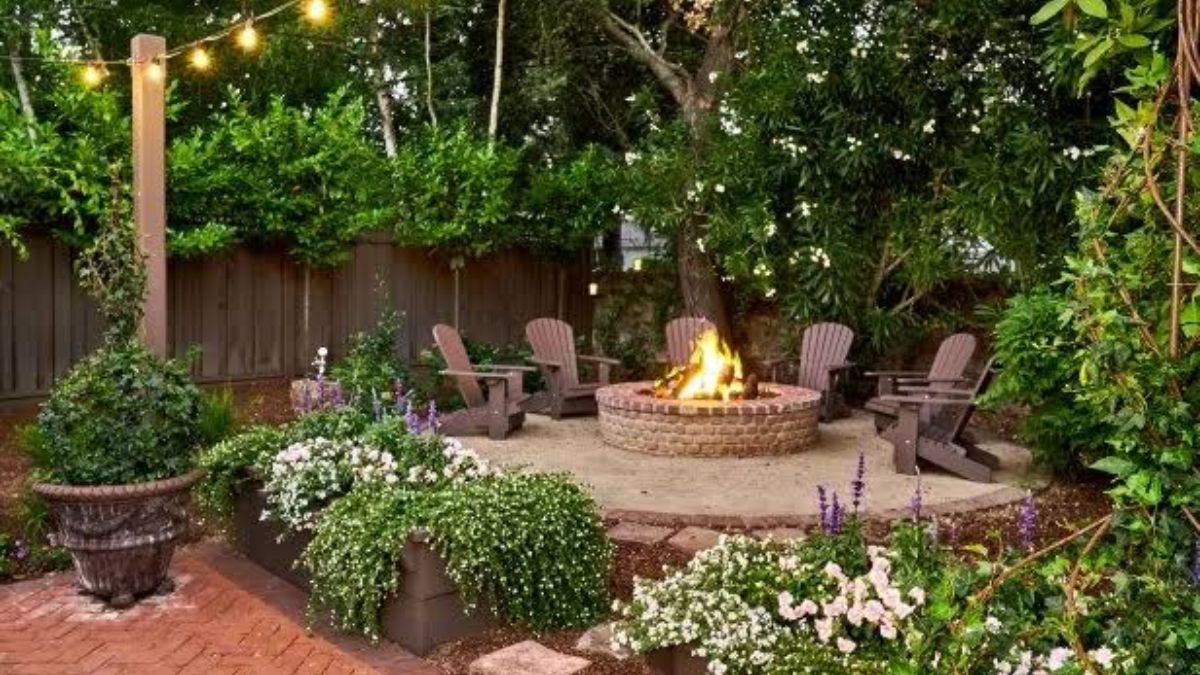
Transforming your backyard into a personal retreat doesn’t have to be overwhelming or expensive. Whether you’re dreaming of a peaceful garden escape or a lively space for entertaining, backyard landscaping ideas can turn even the smallest plot into something special. From simple DIY touches to more ambitious designs, the right choices can boost your home’s value, improve your well-being, and create memories that last.
In this guide, we’ll explore practical, beautiful ways to elevate your outdoor area. You’ll find inspiration for every budget and lifestyle, plus tips to avoid common pitfalls and make smart decisions that stand the test of time.
Why Investing in Your Backyard Pays Off
A well-designed backyard does more than look good. It becomes an extension of your living room — a place to unwind, host gatherings, or watch kids play. Studies show that attractive outdoor spaces can increase property values by up to 20%, while also providing mental health benefits through connection with nature.
But you don’t need a massive budget to see results. Smart planning and a mix of hardscaping and softscaping elements make all the difference.
Assessing Your Backyard Space First
Before diving into plants or patios, take stock of what you have. Measure your yard, note sun exposure, soil type, and any slopes or problem areas. Consider how your family uses the space: relaxation, play, dining, or gardening?
Key factors to evaluate:
- Climate and hardiness zone
- Existing trees or structures
- Drainage and water access
- Privacy needs from neighbors
- Maintenance tolerance
This groundwork prevents costly mistakes later.
Budget-Friendly Backyard Landscaping Ideas
You can achieve big impact without breaking the bank. Focus on high-return projects that use affordable materials and smart plant choices.
Start with mulch and pathways. Fresh mulch instantly neatens beds and suppresses weeds. Pea gravel or stepping stones create defined paths that guide the eye and add structure.
DIY raised garden beds are another winner. Use cedar boards or even recycled materials to grow vegetables and herbs. They look polished and make gardening easier on your back.
Add vertical interest with wall planters or trellises for climbing vines. These take little ground space but deliver lush greenery.
Here’s a helpful comparison of affordable hardscaping options:
| Material | Cost Level | Maintenance | Best For | Durability |
|---|---|---|---|---|
| Pea Gravel | Low | Low | Paths, patios | High |
| Mulch | Very Low | Medium | Garden beds | Medium |
| Pavers/Stepping Stones | Medium | Low | Walkways, seating areas | Very High |
| Recycled Wood | Low | Medium | Raised beds, borders | Medium-High |
Low-Maintenance Designs That Look Effortless
Busy homeowners love options that minimize weekly chores. Native plants and perennials top the list because they adapt to local conditions and return year after year.
Consider replacing thirsty lawns with ground covers like creeping thyme or mondo grass. These create a carpet-like effect with far less mowing and watering.
Xeriscaping — using drought-tolerant plants, rocks, and strategic irrigation — saves water and looks modern. Succulents, ornamental grasses, and lavender thrive with minimal care.
For year-round interest, layer evergreens with flowering shrubs that bloom in different seasons. Add landscape lighting to highlight features at night without extra effort.
Creative Backyard Landscaping Ideas for Entertainment
Turn your yard into the neighborhood hotspot with these features:
- Fire pits or outdoor kitchens: Gather friends around a simple stone-ringed pit or build a basic grill station.
- Patios and decks: Expand usable space with pavers or composite decking that resists weather.
- Water features: A small fountain or pond adds soothing sounds and attracts wildlife.
- String lights and pergolas: Instant ambiance for evening use.
A well-placed pergola covered in vines provides shade and defines zones beautifully.
Family-Friendly and Kid-Approved Layouts
If little ones (or pets) rule your household, prioritize safety and fun. Designate zones: a soft turf play area, secure garden beds, and open space for games.
Incorporate sensory elements like fragrant herbs or textured plants. A simple sandbox or climbing structure integrated into the landscaping keeps everything cohesive.
Small Backyard Landscaping Ideas That Maximize Space
Tight yards shine with vertical and multi-functional designs. Use containers, hanging baskets, and wall-mounted features to layer greenery upward.
Create illusion of depth with curved paths and varying plant heights. Mirrors or strategic lighting can make the space feel larger too.
Zoning tips for small yards:
- Dining nook near the house
- Quiet reading corner in the back
- Compact storage solutions disguised as planters
Sustainable and Eco-Friendly Approaches
Choose native species to support pollinators and reduce chemical needs. Rain gardens and permeable surfaces help manage stormwater naturally.
Compost garden waste on-site and install smart irrigation systems that use weather data to water efficiently.
Pros and Cons of Popular Backyard Landscaping Styles
Modern Minimalist:
- Pros: Clean lines, low maintenance, contemporary appeal
- Cons: Can feel stark if not balanced with texture; higher initial hardscaping cost
Cottage Garden:
- Pros: Romantic, colorful, attracts beneficial insects
- Cons: Higher maintenance for weeding and deadheading
Desert/Xeriscape:
- Pros: Water-saving, unique aesthetic
- Cons: Limited plant variety in cooler climates
Traditional English:
- Pros: Timeless elegance, structured beauty
- Cons: Requires regular pruning and care
Common Mistakes to Avoid in Backyard Landscaping
Many first-timers overload the space or ignore practical needs. Overplanting leads to overcrowding as things mature. Poor drainage creates muddy messes.
Other pitfalls include choosing trendy plants unsuited to your climate or forgetting about access for maintenance. Always plan for growth — leave room between specimens.
Skipping soil testing is another big one. Healthy soil makes everything else easier.
Best Practices for Long-Term Success
- Start small and build in phases to manage costs and effort.
- Layer your planting: Tall trees in back, mid-height shrubs, then low perennials and ground cover.
- Incorporate hardscaping early for structure.
- Use repetition of colors or plants for cohesion.
- Maintain regularly — even low-care designs benefit from seasonal touch-ups.
- Document your progress with photos to track what works.
Test your soil and amend it properly. Group plants with similar water and light needs together (hydrozoning).
Another valuable breakdown:
| Best Practice | Why It Matters | Quick Tip |
|---|---|---|
| Hydrozoning Plants | Saves water and improves health | Group by moisture needs |
| Mulching 2-3x/Year | Retains moisture, blocks weeds | Use organic types |
| Seasonal Color Rotation | Keeps interest all year | Mix perennials and annuals |
| Proper Irrigation | Prevents waste and disease | Drip systems best |
Bringing It All Together: Your Personalized Backyard Vision
The beauty of backyard landscaping lies in making it yours. Blend ideas that fit your lifestyle, whether that’s a peaceful zen garden or a vibrant entertainment hub.
With thoughtful planning, even beginners can create stunning results. Focus on quality materials, right plant choices, and functional layout, and you’ll enjoy your outdoor space for years.
Conclusion
Your backyard has incredible potential waiting to be unlocked. These backyard landscaping ideas offer starting points for every style and budget. Take it step by step, enjoy the process, and watch your outdoor sanctuary come to life. The rewards — relaxation, beauty, and increased home value — make every effort worthwhile.
Ready to get started? Grab a notebook, sketch your dream layout, and begin with one small project this weekend.
/ You May Also Read /
Roofing Nail Gun Guide: Types, Uses, Safety Tips, and How to Choose the Best One
-

 HOME IMPROVEMENT3 months ago
Roof Sheathing: Complete Guide to Types, Materials, Costs, Installation, and Maintenance
-

 HOME IMPROVEMENT3 months ago
Roofing Cop: What It Means, How It Works, and Why Property Owners Use Roofing Advocacy Services
-

 HOME IMPROVEMENT3 months ago
Roof Decking: Complete Guide to Materials, Installation, Costs, and Maintenance
-

 HOME IMPROVEMENT3 months ago
Gable vs Hip Roof: Which Roof Style Is Better for Your Home?
-

 HOME IMPROVEMENT3 months ago
Roof Cricket: Complete Guide to Design, Purpose, Installation, and Best Practices
-

 HOME IMPROVEMENT3 months ago
The Complete Guide to Roofing Shoes: Safety, Grip, and Performance on Every Roof
-
 HOME IMPROVEMENT3 months ago
How Long Does a Roof Last? A Complete Guide to Roof Lifespan and Replacement
-

 HOME IMPROVEMENT3 months ago
Roof Drip Edge Flashing: Complete Guide to Installation, Benefits, Costs, and Best Practices