
HOME IMPROVEMENT
The Complete Guide to Roofing Shoes: Safety, Grip, and Performance on Every Roof

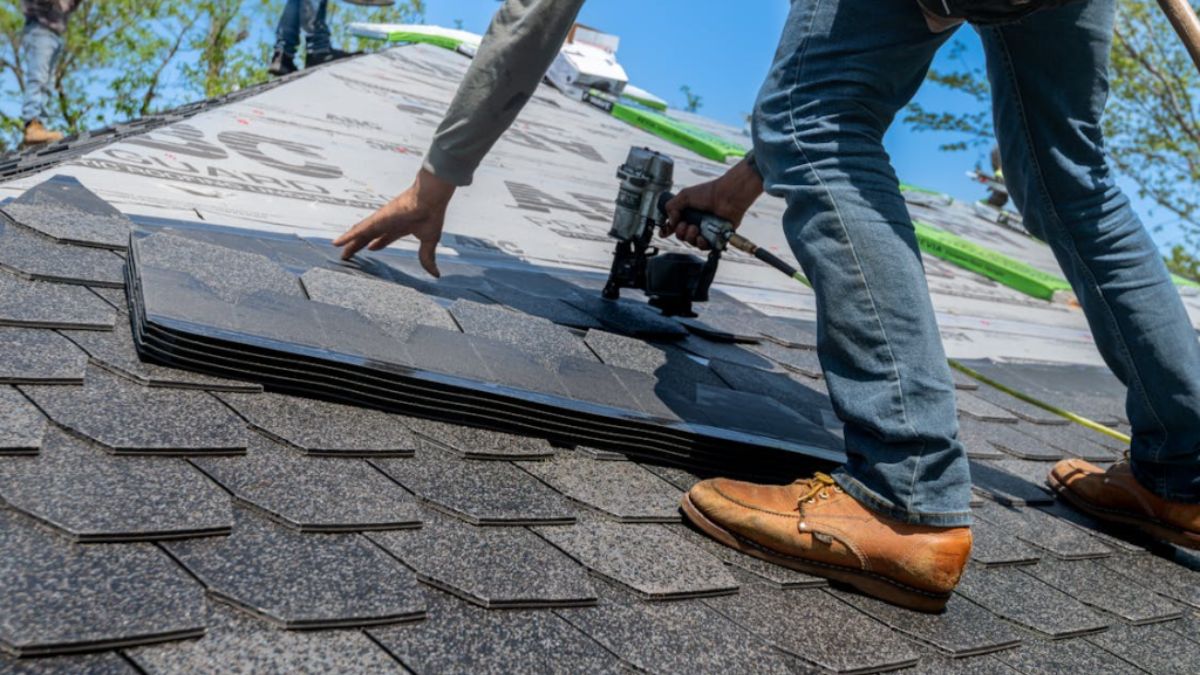
Working on a roof comes with unique challenges, and the right roofing shoes can make a significant difference in safety, comfort, and productivity. Whether you’re a professional roofer, contractor, inspector, or homeowner tackling a roofing project, choosing appropriate footwear is one of the most important safety decisions you can make.
Roof surfaces can be slippery, steep, hot, and unpredictable. Standard work boots may offer protection, but they often lack the specialized grip and flexibility needed for roofing work. That’s where roofing-specific footwear becomes valuable.
In this guide, you’ll learn what roofing shoes are, their key features, how to choose the right pair, common mistakes to avoid, and best practices for staying safe while working at height.
What Are Roofing Shoes?
Roofing shoes are specialized footwear designed to provide superior traction, stability, and comfort when working on rooftops. Unlike conventional work boots, they feature softer rubber soles and enhanced grip patterns that help workers maintain footing on steep or slippery surfaces.
Key Characteristics of Roofing Shoes
Most quality roofing shoes include:
- High-traction rubber soles
- Flexible construction
- Lightweight design
- Slip-resistant materials
- Comfortable cushioning
- Durable upper materials
- Improved surface contact
These features help reduce the risk of slips and falls while allowing roofers to move confidently across various roofing materials.
Why Roofing Shoes Matter for Safety
Falls remain one of the leading causes of injuries in construction. Proper footwear plays a critical role in reducing those risks.
Safety Benefits
- Better traction on shingles and metal surfaces
- Increased stability on steep slopes
- Reduced foot fatigue
- Improved balance during movement
- Enhanced confidence while working at height
When workers feel secure on the roof, they can focus more on the job and less on maintaining balance.
How Specialized Footwear Improves Performance
Beyond safety, proper footwear can improve overall efficiency. Workers can move faster, position themselves more accurately, and maintain comfort during long workdays.
Key Features to Look for in Roofing Shoes
Choosing the right footwear involves understanding which features directly affect performance.
Sole Material
The sole is the most important component.
Soft rubber compounds typically provide:
- Superior grip
- Better flexibility
- Improved roof contact
- Reduced slipping risk
Flexibility
Flexible shoes allow your feet to conform naturally to roof angles, improving stability and comfort.
Weight
Heavy boots can increase fatigue over time. Lightweight footwear helps workers stay comfortable during extended roofing projects.
Durability
Roofing environments are tough on footwear. Quality materials ensure longer service life and better value.
Breathability
Roofing work often occurs during warm weather. Breathable materials help keep feet cool and reduce discomfort.
Roofing Shoe Features Comparison
| Feature | Importance | Benefit |
|---|---|---|
| Soft Rubber Sole | Very High | Maximum roof grip |
| Lightweight Design | High | Reduced fatigue |
| Flexible Construction | High | Better movement |
| Slip Resistance | Very High | Improved safety |
| Breathability | Medium | Greater comfort |
| Durable Upper | High | Longer lifespan |
Types of Roofing Shoes
Different roofing jobs may require different footwear styles.
Athletic-Style Roofing Shoes
These resemble running shoes but feature enhanced grip.
Best for:
- Residential roofing
- Roof inspections
- Light repair work
Advantages:
- Lightweight
- Comfortable
- Flexible
Roofing Boots
Designed for tougher work environments.
Best for:
- Commercial roofing
- Heavy-duty projects
- Challenging weather conditions
Advantages:
- Increased protection
- Better ankle support
- Greater durability
Soft-Sole Work Shoes
Popular among experienced roofers.
Best for:
- Asphalt shingle roofs
- Steep slopes
- Precision work
Advantages:
- Excellent traction
- Superior roof contact
- Enhanced mobility
Best Roofing Shoes for Different Roof Types
Different roofing materials create unique traction challenges.
Asphalt Shingle Roofs
Asphalt shingles generally provide better grip than other surfaces. Soft rubber soles perform particularly well here.
Metal Roofs
Metal roofs become slippery, especially when wet.
Recommended features:
- Aggressive traction patterns
- High-friction rubber compounds
- Excellent slip resistance
Tile Roofs
Tile roofs require careful foot placement to prevent damage.
Ideal footwear should offer:
- Flexible soles
- Lightweight construction
- Controlled movement
Flat Roofs
Flat roofs often involve prolonged standing and walking.
Look for:
- Cushioning
- Comfort
- Long-term support
Roofing Surface and Footwear Match Guide
| Roof Type | Recommended Sole | Flexibility Level | Priority Feature |
|---|---|---|---|
| Asphalt Shingles | Soft Rubber | High | Grip |
| Metal Roofing | High-Traction Rubber | Medium | Slip Resistance |
| Tile Roofing | Flexible Rubber | High | Control |
| Flat Roofing | Cushioned Rubber | Medium | Comfort |
| Composite Roofing | Soft Rubber | High | Stability |
Pros and Cons of Roofing Shoes
Pros
- Improved safety
- Better traction
- Increased comfort
- Reduced fatigue
- Greater productivity
- Enhanced confidence on steep roofs
Cons
- Specialized footwear may cost more
- Soft soles can wear faster
- Some models provide less ankle protection
- Frequent replacement may be necessary for heavy use
Common Mistakes When Choosing Roofing Shoes
Many buyers focus on price rather than performance.
Choosing Heavy Work Boots
Heavy boots may provide protection but often reduce flexibility and roof grip.
Ignoring Sole Quality
The sole determines traction. Selecting footwear with poor grip can increase accident risk.
Buying the Wrong Size
Footwear that is too loose or too tight can affect balance and comfort.
Overlooking Weather Conditions
Different environments require different performance characteristics. Consider temperature, moisture, and roof material before selecting footwear.
Using Worn-Out Shoes
Even high-quality footwear loses effectiveness as tread wears down.
Roofing Shoe Buying Checklist
| Buying Factor | What to Check | Why It Matters |
|---|---|---|
| Traction | Soft rubber sole | Prevents slips |
| Comfort | Cushioning and fit | Reduces fatigue |
| Durability | Quality materials | Longer lifespan |
| Weight | Lightweight design | Easier movement |
| Flexibility | Natural foot movement | Better balance |
| Breathability | Airflow features | Improved comfort |
Best Practices for Using Roofing Shoes
Choosing the right footwear is only part of the equation.
Inspect Footwear Regularly
Check for:
- Worn tread
- Cracked soles
- Loose stitching
- Damaged laces
Replace footwear when traction begins to decline.
Keep Soles Clean
Debris trapped in shoe tread can reduce grip significantly.
Before climbing a roof:
- Remove mud
- Clean dirt
- Check for embedded materials
Match Footwear to Conditions
Wet roofs require maximum traction. Hot weather may demand greater breathability.
Combine Footwear with Other Safety Measures
Footwear should support a broader safety strategy that includes:
- Fall protection systems
- Safety harnesses
- Roof anchors
- Proper training
How Long Do Roofing Shoes Last?
The lifespan depends on usage frequency, roof materials, and construction quality.
Typical estimates include:
- Occasional use: 1–3 years
- Regular professional use: 6–18 months
- Heavy commercial use: 6–12 months
Signs replacement is needed:
- Reduced traction
- Uneven wear
- Sole separation
- Loss of cushioning
Are Roofing Shoes Worth the Investment?
For anyone who spends time on rooftops, specialized footwear is often a worthwhile investment.
The benefits extend beyond safety:
- Better work performance
- Greater comfort
- Lower fatigue
- Increased confidence
- Reduced injury risk
Considering the potential consequences of a fall, quality roofing footwear represents a small investment compared to the value it provides.
Conclusion
Roofing shoes are an essential piece of safety equipment for anyone working at height. Their specialized design delivers superior traction, flexibility, and comfort compared to standard footwear. By selecting shoes with quality rubber soles, proper fit, and durable construction, workers can significantly improve both safety and performance.
Whether you’re installing shingles, conducting inspections, or handling repairs, the right footwear can help you work more confidently and efficiently. Invest in quality, maintain your shoes properly, and always combine them with proven roofing safety practices.
Frequently Asked Questions
1. What makes roofing shoes different from regular work boots?
Roofing shoes typically feature softer rubber soles and greater flexibility, providing improved traction and stability on roof surfaces.
2. Are roofing shoes necessary for residential roofing?
Yes. Even simple residential roofing projects can involve steep slopes and slippery conditions where specialized footwear improves safety.
3. Can roofing shoes be used on metal roofs?
Yes. Many roofing shoes are specifically designed to provide enhanced traction on metal roofing systems.
4. How often should roofing shoes be replaced?
Replacement depends on usage and wear. Most professionals replace them when traction noticeably declines.
5. Do roofing shoes prevent falls completely?
No. They reduce risk but should always be used alongside proper fall protection equipment and safe work practices.
/ You May Also Read /
Roof Sheathing: Complete Guide to Types, Materials, Costs, Installation, and Maintenance
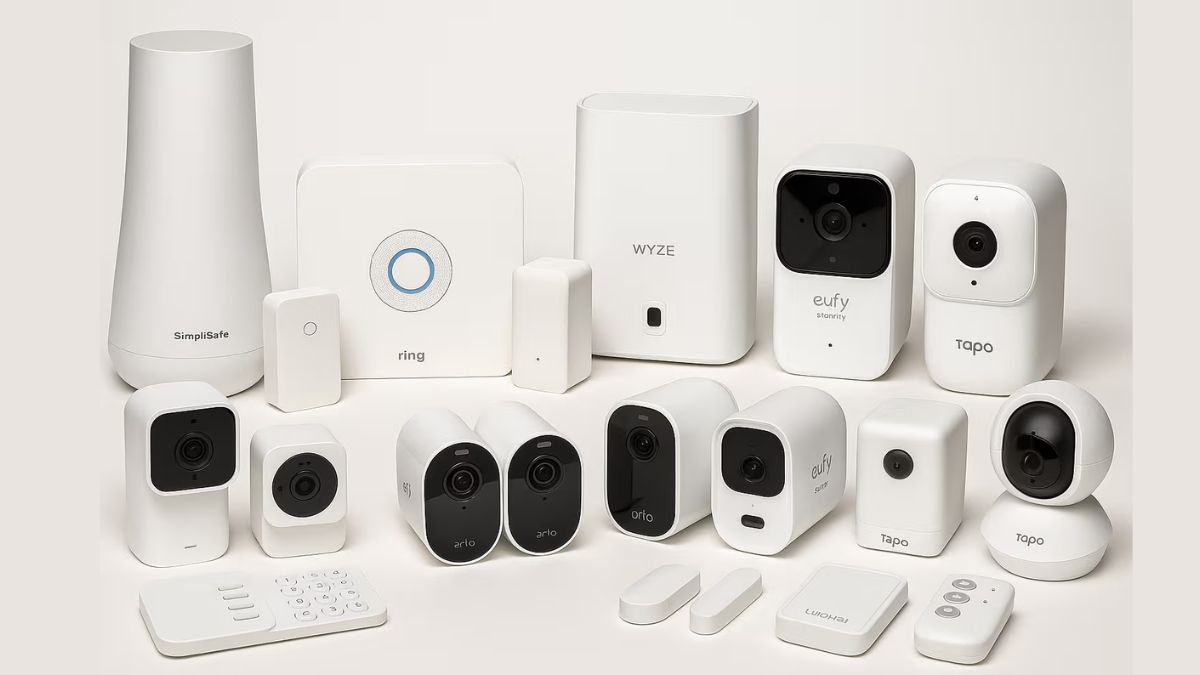
Choosing the best home security system can feel overwhelming. Yet the right one brings real peace of mind in 2026. Whether you want professional monitoring or a simple DIY setup, today’s options protect better than ever while fitting different budgets and lifestyles.
This guide ranks the top systems based on expert tests, owner feedback, and current features. We focus on ease of use, reliability, smart home options, and value so you can decide quickly.
Quick Comparison of Top Systems
| System | Best For | Monitoring Starts At | Installation | Key Strength | Approx. Starter Cost |
|---|---|---|---|---|---|
| ADT | Professional monitoring | $28.99/mo | Pro or DIY | Google Nest integration | Varies by package |
| SimpliSafe | Overall value & DIY | $19.99–$22.80/mo | DIY (easy) | No contracts, fast response | $250–$500 |
| Vivint | Smart home automation | $29.99/mo | Professional | Full automation & cameras | $599+ |
| Ring Alarm | Cameras & Alexa | $10–$20/mo | DIY | Ecosystem & video | $200–$330 |
| Cove | Affordable basics | $19.99/mo | DIY or Pro | Simple & budget-friendly | Quote-based |
| Abode | HomeKit & flexibility | From $6/mo or free self | DIY | Multi-platform support | Around $300–$400 |
Data reflects 2026 expert consensus and pricing ranges from major review sites. Actual costs change with promotions and home size.
What Is the Best Home Security System in 2026?
The best home security system depends on your needs. For most people, SimpliSafe stands out for its balance of price, no-contract flexibility, and strong professional monitoring. ADT leads for those who prefer full professional service and Nest cameras. Vivint wins for advanced smart-home control. Ring shines if you already use Amazon devices.
1. ADT — Best for Professional Monitoring
ADT has protected homes for over 150 years. In 2026 it earns top marks from several expert sites for reliable 24/7 monitoring and deep Google Nest camera integration.
You get Trusted Neighbor features, activity zones, and facial recognition on many packages. Response times stay strong. Installation is usually professional, though some DIY options exist. Monthly monitoring often starts around $28.99. Contracts are common unless you pay equipment up front.
Interestingly, its long track record and insurance discounts appeal to many homeowners. However, higher ongoing costs make it less ideal for tight budgets.
2. SimpliSafe — Best Overall Value and DIY Option
SimpliSafe consistently ranks near the top across SafeHome, Security.org, Reviews.org, and Consumer Reports member surveys in 2026. Setup takes about 30 minutes with peel-and-stick sensors. No long contracts exist. Monitoring plans start near $20–$23 per month and include cellular backup.
The system detects intrusions quickly. Optional Active Guard can deter break-ins in real time. Kits suit apartments, houses, and renters. You can self-monitor or add professional service.
What makes this unique is the combination of simplicity and solid protection without locking you in. Think about it: many owners praise the transparent pricing and easy expansion.
3. Vivint — Best for Home Automation
Vivint delivers premium smart-home security. Professional installation and high-quality cameras create a seamless experience. The app and automation features stand out for lighting, locks, and climate control.
Monitoring typically starts higher, around $30 per month, and equipment costs more. Financing options exist, though total long-term cost rises. Experts rate it highly for those who want everything connected and professionally managed.
4. Ring Alarm — Best for Cameras and Alexa Users
Ring Alarm works best if your home already runs on Amazon devices. Starter kits begin affordably. Optional monitoring is flexible and relatively low-cost. The deep camera and doorbell ecosystem is a major plus.
Cellular backup and professional response options are available on higher plans. DIY installation is straightforward. It scores well for renters and budget-conscious buyers who value video.
5. Cove and Abode — Strong Contenders for Specific Needs
Cove offers simple, affordable professional monitoring with lifetime equipment warranties in many cases. Abode stands out for Apple HomeKit support, free self-monitoring, and broad smart-home compatibility including Z-Wave and Zigbee. Both avoid long contracts and suit DIY users.
Eufy also deserves mention for those who want zero or near-zero monthly fees with local storage and AI processing.
How to Choose the Right System for You
Start with your priorities. Do you want zero monthly fees? Look at Eufy or Abode self-monitoring. Prefer professional response without drilling? SimpliSafe or Cove fit well. Already invested in Nest or Alexa? Match the ecosystem.
Consider home size, rental status, and whether you value cameras highly. Most modern systems use wireless sensors and offer mobile apps for remote control. Battery and cellular backups matter during outages.
Additionally, check local insurance discounts. Many providers help reduce premiums.
Pricing and What You Actually Pay
Equipment ranges from under $200 for basic kits to over $1,000 for fully loaded pro systems. Monitoring adds $10–$50 monthly depending on features. Over three years, DIY no-contract options often cost less overall than premium installed systems.
Always verify current promotions. Many offer free equipment or first-month monitoring.
Interesting Facts About Modern Home Security
Today’s systems process video with local AI in some cases, reducing cloud reliance. Cellular backup keeps protection alive if Wi-Fi drops. Many sensors now detect packages, people, and pets more accurately than older models.
Moreover, DIY systems have closed the gap with traditional pro-installed ones for most households. Response technology continues to improve year after year.
Where Home Security Stands in 2026
In 2026 the market favors flexible, contract-free options alongside strong professional brands. Smart-home integration is standard. Local storage and privacy features have grown in popularity. Owners report higher satisfaction when systems match their daily tech habits rather than forcing new ones.
Public information shows continued innovation in cameras, sensors, and monitoring apps. The best choice remains the one you will actually use and maintain.
FAQs
What is the best home security system overall in 2026?
SimpliSafe ranks as the top choice for most people due to easy DIY setup, no contracts, and reliable professional monitoring options. ADT leads for full-service professional needs.
Is professional monitoring worth the monthly fee?
Yes for many households. It provides 24/7 response and can deter crimes faster. Self-monitoring works if you stay alert and nearby.
Can I install a system myself?
Most top DIY options like SimpliSafe, Ring, Cove, and Abode install in under an hour with no special tools. Professional installation remains available for complex homes.
Do these systems work during power or internet outages?
Quality systems include battery backup and cellular connectivity on higher plans so protection continues.
Which system is best for renters?
SimpliSafe, Ring Alarm, and Abode stand out because they are wireless, portable, and contract-free.
Conclusion
The best home security system gives you confidence every time you leave or sleep. In 2026 SimpliSafe offers the strongest all-around package for most people, while ADT, Vivint, and Ring serve clear niches. Match the system to your lifestyle, budget, and existing smart devices. Then enjoy the quiet assurance that your home is protected. Start with a kit that fits today and expand as needed. Your peace of mind is worth it.
/ You May Also Read /
Gable vs Hip Roof: Which Roof Style Is Better for Your Home?
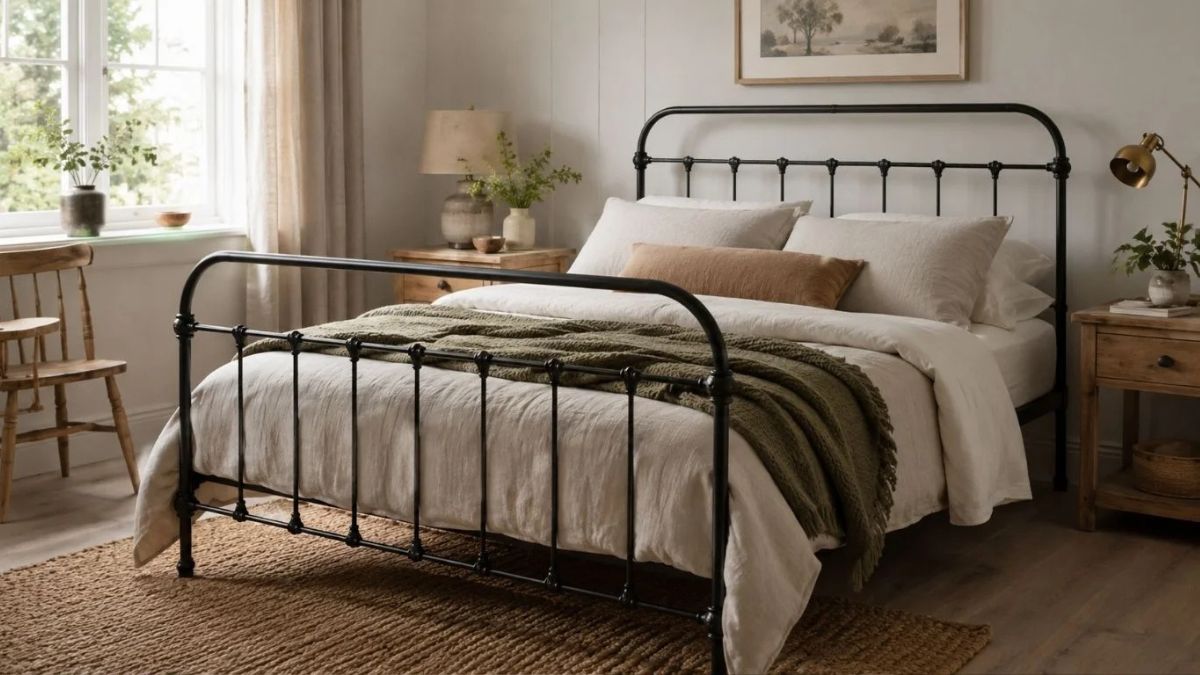
Have you ever searched for a bed that actually lasts? One that shrugs off years of use without warping or attracting pests? That search often leads people straight to jernsenger.
This Scandinavian term simply means iron beds. These metal frames have quietly outlasted trends for generations. In 2026 they remain a smart choice for anyone who values strength and timeless style over disposable furniture.
Quick Facts
| Full Name / Term | Meaning | Origin | Main Material | Typical Lifespan | Common Styles | Maintenance | Best For |
|---|---|---|---|---|---|---|---|
| Jernsenger | Iron beds | Scandinavian (Norwegian/Danish) | Wrought iron, cast iron, or steel | 20–50+ years | Minimalist, Victorian, Industrial, Nordic | Low | Long-term use, durable homes |
What Is Jernsenger?
Jernsenger is the Scandinavian word for iron beds. “Jern” means iron and “senger” means beds. It refers to sturdy bed frames made primarily from iron or steel. These frames became popular because they resist pests, moisture, and everyday wear far better than wood. Today the term covers both traditional hand-forged pieces and modern powder-coated steel versions.
Early Life and Background of Iron Beds
Iron beds did not appear overnight. For centuries most people slept on wooden frames. Wood worked, yet it warped, cracked, and invited bedbugs.
Family and Early Influences
In Northern Europe the need for something tougher grew clear. Harsh winters and practical mindsets pushed blacksmiths to experiment with iron. Aristocratic homes first enjoyed ornate iron beds in the late medieval and Renaissance periods. These pieces signaled status and lasted for generations.
Education and Career Journey of the Iron Bed
The real rise came with the Industrial Revolution. Mass production turned iron beds from luxury items into practical options for more families.
Career Beginnings
Early iron beds used wrought iron shaped by hand. Blacksmiths added scrolls, floral motifs, and family crests. The frames offered hygiene advantages wooden beds could not match.
Rise to Fame
During the 18th and 19th centuries iron beds spread widely. Factories produced them faster and cheaper. Victorian households especially favored them for cleanliness and strength.
Major Achievements
By the 20th century steel versions appeared. Powder-coated finishes improved rust resistance. In 2026 modern jernsenger still win for durability while fitting minimalist and industrial interiors.
Career Timeline
| Year / Period | Milestone | Details |
|---|---|---|
| Late Medieval / Renaissance | Early ornate iron beds | Hand-forged for wealthy homes |
| 18th–19th Century | Industrial spread | Mass production makes iron beds more affordable |
| Victorian Era | Hygiene popularity | Preferred over wood to reduce pests |
| 20th Century | Steel and coatings | Lighter frames and better rust protection |
| 2020s–2026 | Modern revival | Focus on powder-coated steel, center supports, and eco-conscious design |
Net Worth and Income Sources
Iron beds are products, not people, so traditional net-worth figures do not apply. The value instead shows in long-term savings and market strength.
How They Make Money (Value Perspective)
Buyers gain years of reliable use. Manufacturers and sellers profit from a growing preference for durable furniture.
Net Worth Breakdown (Value Focus)
| Income / Value Source | Estimated Benefit | Notes |
|---|---|---|
| Longevity | 20–50+ years of use | Far outlasts many wooden frames |
| Low maintenance | Minimal repairs | Powder coating reduces rust risk |
| Resale / heirloom potential | High | Well-kept frames can pass to next generation |
| Market demand | Strong in metal furniture sector | Reflects preference for lasting pieces |
Personal Life and Lifestyle
A jernsenger fits almost any bedroom style. Minimalist black frames suit modern Nordic homes. Ornate scrollwork works in classic or industrial spaces.
Relationships and Family
These beds often become family pieces. Many owners keep the same frame for decades. The sturdy structure supports heavier mattresses and daily movement without complaint.
What Makes Jernsenger Unique or Different
Think about it. Most cheap frames start creaking or sagging within a few years. Jernsenger frames handle weight better, resist pests, and keep their shape.
Powder-coated steel versions add modern color options while keeping the core strength. Center support beams on larger sizes prevent sagging. Slat spacing under 6 cm improves mattress support and airflow.
Challenges, Struggles, or Controversies
Public information about major controversies is limited. Early iron beds could rust if coatings failed. Modern powder-coated versions largely solve this when the finish stays intact. In humid climates owners still check joints and touch up any chips.
Weight is another practical point. Solid iron frames feel heavier to move than wood or engineered options.
Public Image, Influence, and Legacy
Jernsenger stands for practical Scandinavian design. Strength meets quiet elegance. The style influences today’s industrial and minimalist bedrooms. Many people choose these frames because they refuse the throwaway culture of cheap furniture.
Interesting and Lesser-Known Facts
- The word comes straight from Norwegian and Danish roots.
- In Svalbard an old iron bedstead nicknamed “Jernsenga” still serves as a landmark in Adventdalen.
- Traditional versions often featured hand-forged details that no two pieces shared exactly.
- Modern guides recommend steel wall thickness of at least 1.0–1.2 mm for lasting quality.
Related Celebrities and Comparisons
Jernsenger frames compare favorably to high-end wooden or upholstered beds. They share the durability focus of classic Scandinavian furniture brands that prioritize function over fleeting trends. Unlike many platform beds that rely on particle board, iron versions avoid the common sagging problems.
Where Are They Now — 2026 Update
In 2026 interest in jernsenger remains strong. Buyers look for powder-coated steel frames with solid center supports and tighter slat spacing. Sustainability concerns push people toward pieces that last decades instead of a few years. Designers continue mixing classic iron looks with clean modern lines.
FAQs
What does jernsenger mean?
Jernsenger is a Scandinavian term that translates to iron beds. It describes bed frames made mainly from iron or steel.
Are jernsenger more durable than wooden beds?
Yes. Iron and steel resist warping, cracking, and pests better than wood. With proper coating they often last decades.
Do modern jernsenger beds rust? Powder-coated versions resist rust well. Damage to the coating can allow corrosion, especially in humid rooms. Simple touch-ups prevent most issues.
What should I look for when buying a jernsenger?
Check steel thickness (ideally 1.0 mm or more), center support on larger sizes, and tight slat spacing. Weight capacity of 300 kg or higher is useful for king beds.
Can jernsenger fit modern bedrooms?
Absolutely. Clean-lined steel frames suit minimalist and industrial styles. Ornate versions work in classic or eclectic spaces.
Conclusion
Jernsenger offers something rare in today’s furniture market: honest strength that does not chase trends. These iron beds started as practical solutions in Scandinavian homes and still deliver the same quiet reliability.
Whether you want a frame that will still look solid in twenty years or simply prefer metal that refuses to sag, jernsenger remains a smart and stylish answer. Choose well, care for the finish, and the bed will keep supporting good sleep for a very long time.
/ You May Also Read /
Roof Cricket: Complete Guide to Design, Purpose, Installation, and Best Practices
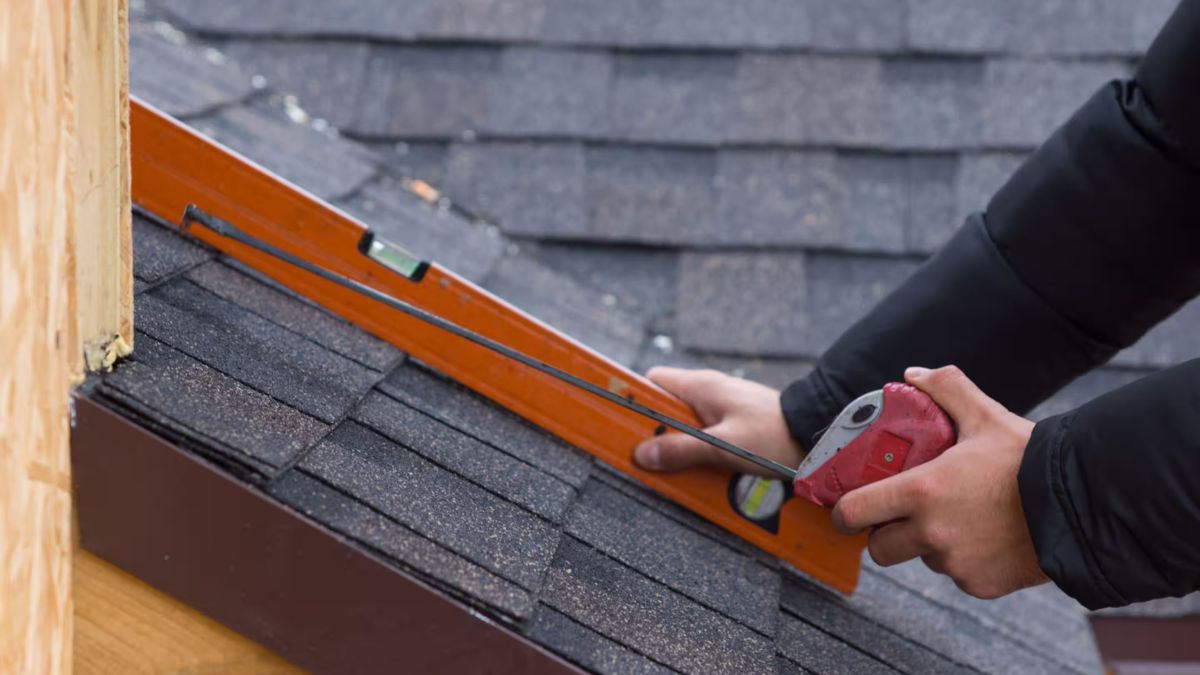
A roof pitch chart is one of the most useful tools for homeowners, roofing contractors, builders, and architects. It helps determine the steepness of a roof, estimate materials, calculate drainage efficiency, and ensure compliance with building requirements.
Whether you’re planning a new roof installation, replacing shingles, or simply trying to understand your home’s structure, knowing how to read a roof pitch chart can save time and prevent costly mistakes.
In this guide, you’ll learn what roof pitch means, how roof pitch charts work, common roof pitch measurements, and the best practices for choosing the right roof slope.
What Is Roof Pitch?
Roof pitch refers to the steepness or slope of a roof. It is commonly expressed as a ratio showing how many inches a roof rises vertically for every 12 inches of horizontal run.
For example:
- 4/12 pitch = rises 4 inches for every 12 inches of run
- 6/12 pitch = rises 6 inches for every 12 inches of run
- 12/12 pitch = rises 12 inches for every 12 inches of run
The higher the first number, the steeper the roof.
Why Roof Pitch Matters
Roof pitch affects:
- Water drainage
- Snow shedding
- Wind resistance
- Roofing material selection
- Installation costs
- Roof maintenance requirements
- Attic space and ventilation
A properly designed roof slope helps extend the lifespan of roofing materials and improves overall building performance.
Understanding a Roof Pitch Chart
A roof pitch chart converts roof slope measurements into degrees and other useful construction calculations.
Standard Roof Pitch Conversion Table
| Roof Pitch | Roof Angle (Degrees) | Classification |
|---|---|---|
| 1/12 | 4.8° | Very Low Slope |
| 2/12 | 9.5° | Low Slope |
| 3/12 | 14.0° | Low Slope |
| 4/12 | 18.4° | Conventional |
| 5/12 | 22.6° | Conventional |
| 6/12 | 26.6° | Standard Residential |
| 7/12 | 30.3° | Moderately Steep |
| 8/12 | 33.7° | Steep |
| 9/12 | 36.9° | Steep |
| 10/12 | 39.8° | Very Steep |
| 12/12 | 45.0° | Extremely Steep |
This chart provides a quick reference when converting roof pitch into roof angle measurements.
Featured Snippet Answer
What is a roof pitch chart?
A roof pitch chart is a reference table that converts roof slope ratios into angles, percentages, and classifications. Builders and homeowners use it to measure roof steepness and determine suitable roofing materials.
How to Measure Roof Pitch
Measuring roof pitch is relatively straightforward when using the proper tools.
Method 1: Measure from the Roof Surface
You will need:
- Level
- Tape measure
- Pencil
- Safety equipment
Steps:
- Place a 12-inch level horizontally.
- Measure the vertical distance from the roof surface to the end of the level.
- Record the rise measurement.
- Express the result as rise over 12.
Example:
- Rise = 6 inches
- Run = 12 inches
- Pitch = 6/12
Method 2: Measure from the Attic
This method is often safer.
- Access the attic.
- Place a level against a rafter.
- Measure the rise at the 12-inch mark.
- Record the pitch ratio.
This provides an accurate reading without climbing onto the roof.
Common Roof Pitch Categories
Different buildings require different roof slopes depending on climate and design goals.
Low-Slope Roofs
Low-slope roofs generally range from 1/12 to 3/12.
Advantages:
- Lower construction cost
- Easier access
- Modern appearance
Challenges:
- Slower drainage
- Greater leak risk
- Special membrane systems often required
Conventional Roofs
Conventional residential roofs typically range from 4/12 to 9/12.
Benefits include:
- Effective drainage
- Broad material compatibility
- Easier maintenance
This range is among the most common in residential construction.
Steep-Slope Roofs
Steep roofs usually exceed 9/12 pitch.
Advantages:
- Excellent water runoff
- Better snow shedding
- Distinctive appearance
Disadvantages:
- Higher installation costs
- Increased safety requirements
- More difficult repairs
Roof Pitch and Roofing Material Selection
Not every roofing material performs equally on every roof slope.
Roofing Material Compatibility Table
| Roofing Material | Recommended Pitch | Performance Notes |
|---|---|---|
| Asphalt Shingles | 4/12 and above | Most common residential option |
| Metal Roofing | 3/12 and above | Excellent durability |
| Clay Tile | 4/12 and above | Heavy but attractive |
| Slate Roofing | 4/12 and above | Premium lifespan |
| Standing Seam Metal | 2/12 and above | Suitable for lower slopes |
| Built-Up Roofing | 1/12 to 3/12 | Designed for low-slope systems |
| EPDM Membrane | 1/12 to 3/12 | Ideal for flat-style roofs |
Choosing materials compatible with the roof pitch helps prevent premature wear and water intrusion.
How Roof Pitch Impacts Drainage
One of the primary functions of roof slope is water management.
Steeper roofs move rainwater away more quickly. Low-slope roofs require carefully designed drainage systems because water remains on the surface longer.
Water Drainage Comparison
| Roof Pitch Range | Drainage Speed | Leak Risk |
|---|---|---|
| 1/12–3/12 | Slow | Higher |
| 4/12–6/12 | Moderate | Low |
| 7/12–9/12 | Fast | Very Low |
| 10/12+ | Very Fast | Minimal |
Proper drainage extends roof life and reduces maintenance costs.
Calculating Roof Pitch for Construction Projects
Roof pitch calculations influence numerous construction decisions.
Important Construction Factors
Material Quantities
Steeper roofs have more surface area.
As roof pitch increases:
- Shingle requirements increase
- Underlayment requirements increase
- Labor costs increase
Structural Loads
Roof pitch affects:
- Snow loads
- Wind uplift
- Structural framing requirements
Builders use pitch data to determine the proper support systems.
Building Appearance
Roof pitch strongly influences curb appeal.
Examples include:
- Colonial homes often use medium slopes.
- Tudor-style homes frequently feature steep roofs.
- Modern designs may use low-slope configurations.
Best Roof Pitch for Different Climates
Climate plays a major role in roof design.
Snowy Regions
Recommended pitches:
- 6/12 to 12/12
Benefits:
- Faster snow shedding
- Reduced structural loading
Rainy Areas
Recommended pitches:
- 4/12 to 9/12
Benefits:
- Effective drainage
- Lower standing water risk
Wind-Prone Locations
Recommended pitches:
- Moderate slopes often perform best.
Extremely steep roofs may experience higher wind pressures in certain conditions.
Common Mistakes When Using a Roof Pitch Chart
Even experienced property owners occasionally misunderstand roof pitch measurements.
Mistake 1: Confusing Pitch and Angle
Pitch ratios and degree measurements are related but not identical.
For example:
- 6/12 pitch equals approximately 26.6 degrees.
Mistake 2: Estimating by Sight
Visual estimates often produce inaccurate results.
Always measure directly.
Mistake 3: Ignoring Material Requirements
Some roofing systems require minimum slope specifications.
Installing incompatible materials can lead to warranty issues.
Mistake 4: Overlooking Local Building Codes
Building regulations may specify minimum roof slope requirements for certain materials.
Always verify code requirements before construction begins.
Pros and Cons of Steeper Roof Pitches
Pros
- Better water runoff
- Improved snow shedding
- Longer shingle lifespan
- Increased attic space
- Strong visual appeal
Cons
- Higher construction costs
- More difficult maintenance
- Increased safety concerns
- Greater material usage
Best Practices for Reading a Roof Pitch Chart
To get accurate results from a roof pitch chart:
- Measure carefully using proper tools.
- Verify pitch from multiple locations.
- Match roofing materials to slope requirements.
- Consider local weather conditions.
- Consult building codes before installation.
- Factor roof pitch into budget estimates.
- Use professional inspections for complex roof designs.
Following these practices helps avoid installation errors and improves roof performance.
Practical Example of Roof Pitch Selection
Imagine a homeowner building a new house in a region with heavy rainfall.
The builder evaluates several options:
- 3/12 pitch: Lower cost but slower drainage.
- 6/12 pitch: Balanced performance and appearance.
- 10/12 pitch: Excellent drainage but higher construction costs.
In most cases, a 6/12 pitch provides an ideal balance between aesthetics, drainage, affordability, and maintenance.
Conclusion
A roof pitch chart is an essential reference for understanding roof slope measurements and making informed roofing decisions. From selecting materials to estimating costs and improving drainage performance, roof pitch affects nearly every aspect of a roofing project.
Whether you’re a homeowner planning renovations or a contractor designing a new structure, understanding roof pitch ratios and conversion charts will help you achieve better results. By measuring accurately, selecting compatible materials, and considering local climate conditions, you can build a roof that performs efficiently for many years.
SEO FAQs
1. What is the most common residential roof pitch?
The most common residential roof pitches range between 4/12 and 9/12, with 6/12 being especially popular.
2. How do I read a roof pitch chart?
Read the pitch ratio and match it with the corresponding angle, slope category, and roofing recommendations shown in the chart.
3. What roof pitch is considered steep?
Most roofing professionals consider pitches above 9/12 to be steep-slope roofs.
4. Can shingles be installed on a low-slope roof?
Some shingles can be installed on lower slopes, but special underlayment requirements often apply below 4/12 pitch.
5. Why is roof pitch important?
Roof pitch affects drainage, material selection, installation costs, structural performance, and overall roof lifespan.
/ You May Also Read /
Roofing Cop: What It Means, How It Works, and Why Property Owners Use Roofing Advocacy Services
-
 HOME IMPROVEMENT1 month ago
Roof Sheathing: Complete Guide to Types, Materials, Costs, Installation, and Maintenance
-
 HOME IMPROVEMENT1 month ago
Roofing Cop: What It Means, How It Works, and Why Property Owners Use Roofing Advocacy Services
-
 HOME IMPROVEMENT1 month ago
Roof Decking: Complete Guide to Materials, Installation, Costs, and Maintenance
-
 HOME IMPROVEMENT1 month ago
Roof Cricket: Complete Guide to Design, Purpose, Installation, and Best Practices
-
 HOME IMPROVEMENT1 month ago
How Long Does a Roof Last? A Complete Guide to Roof Lifespan and Replacement
-

 HOME IMPROVEMENT1 month ago
Gable vs Hip Roof: Which Roof Style Is Better for Your Home?
-
 HOME IMPROVEMENT1 month ago
Roof Drip Edge Flashing: Complete Guide to Installation, Benefits, Costs, and Best Practices
-
 HOME IMPROVEMENT1 month ago
Ridge Vent Roof: Complete Guide to Better Attic Ventilation, Energy Efficiency, and Roof Protection