HOME IMPROVEMENT
Roofing Nails: Complete Guide to Types, Sizes, Materials, and Proper Installation
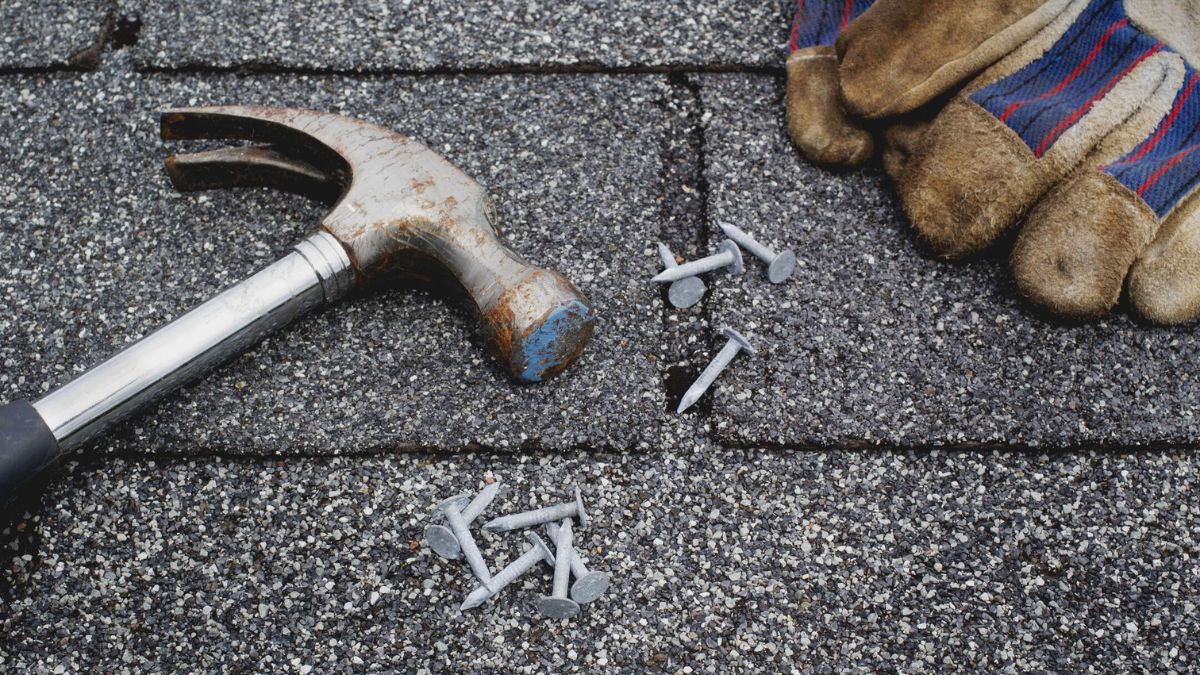
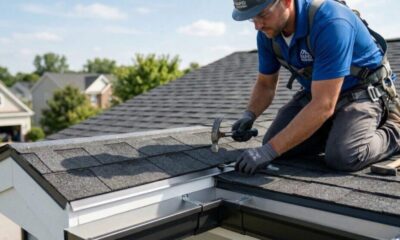
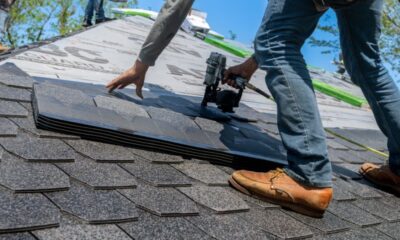
A strong roof depends on more than quality shingles. The fasteners holding everything together play an equally important role. Roofing nails are specifically designed to secure roofing materials while resisting weather, wind uplift, and long-term wear.
Whether you’re a homeowner planning a roof replacement or a contractor looking for best practices, understanding roofing nails can help you avoid costly mistakes. From choosing the right nail length to selecting corrosion-resistant materials, every detail matters.
This guide covers everything you need to know about roofing nails, including types, sizes, materials, installation methods, common mistakes, and professional recommendations.
What Are Roofing Nails?
Roofing nails are specialized fasteners designed to attach roofing materials such as asphalt shingles, underlayment, felt paper, and flashing to a roof deck.
Unlike standard construction nails, roofing nails feature a larger head that helps hold roofing materials securely in place. They are also manufactured from materials that can withstand exposure to moisture, temperature changes, and harsh weather conditions.
Key Features of Roofing Nails
- Large flat heads for improved holding power
- Sharp points for easier penetration
- Corrosion-resistant coatings
- Various shank designs for different applications
- Available in multiple lengths and gauges
Why Roofing Nails Matter
Improper fasteners can cause:
- Shingle blow-offs during storms
- Water infiltration
- Premature roof failure
- Warranty issues
- Increased maintenance costs
Choosing the correct roofing nail helps maximize roof lifespan and performance.
Types of Roofing Nails
Several types of roofing nails are available, each suited to specific roofing applications.
Smooth Shank Roofing Nails
Smooth shank nails are the most common and affordable option.
Benefits include:
- Easy installation
- Cost-effective
- Suitable for many residential roofing projects
However, they provide less holding power than ring shank alternatives.
Ring Shank Roofing Nails
Ring shank nails feature circular ridges along the shank.
Advantages:
- Superior grip strength
- Better wind resistance
- Reduced nail pullout risk
These nails are often recommended in areas with strong winds.
Screw Shank Roofing Nails
Screw shank nails resemble screws and provide exceptional holding power.
Best used for:
- High-wind regions
- Special roofing applications
- Projects requiring maximum retention
Roofing Nail Materials
The material used affects durability, corrosion resistance, and roof longevity.
| Roofing Nail Material | Best Use | Corrosion Resistance | Cost Level |
|---|---|---|---|
| Galvanized Steel | Standard roofing projects | High | Low |
| Stainless Steel | Coastal areas | Excellent | High |
| Aluminum | Specific roofing systems | Moderate | Medium |
| Copper | Premium roofing materials | Excellent | Very High |
Galvanized Steel Nails
Galvanized roofing nails are the industry standard.
Benefits include:
- Affordable pricing
- Good rust protection
- Widely available
- Suitable for most climates
Stainless Steel Nails
Stainless steel roofing nails are ideal for coastal environments where salt exposure can accelerate corrosion.
Copper Nails
Copper nails are often used with slate, tile, and premium roofing systems where long-term durability is a priority.
Roofing Nail Sizes Explained
Choosing the correct size is critical for proper roof performance.
Common Roofing Nail Lengths
| Nail Length | Typical Application |
|---|---|
| 3/4 inch | Thin roofing materials |
| 1 inch | Standard asphalt shingles |
| 1 1/4 inch | Most residential roofs |
| 1 1/2 inch | Thicker roofing assemblies |
| 2 inches+ | Multiple roofing layers |
General Sizing Rule
A roofing nail should penetrate at least 3/4 inch into the roof deck or pass completely through the decking.
Nail Head Diameter
Most building codes require a minimum head diameter of approximately 3/8 inch to ensure adequate holding power.
How to Choose the Right Roofing Nails
Selecting the correct roofing nail depends on several factors.
Roofing Material
Different materials require different fasteners:
- Asphalt shingles: Galvanized roofing nails
- Metal roofing: Manufacturer-approved fasteners
- Slate roofing: Copper or stainless steel nails
- Wood shakes: Corrosion-resistant nails
Climate Conditions
Environmental exposure significantly impacts nail selection.
Consider:
- Coastal salt exposure
- Heavy rainfall
- Snow accumulation
- High winds
- Humidity levels
Building Codes
Always verify local building code requirements before purchasing roofing nails.
Some regions require:
- Ring shank nails
- Specific corrosion-resistant coatings
- Increased fastener counts for wind zones
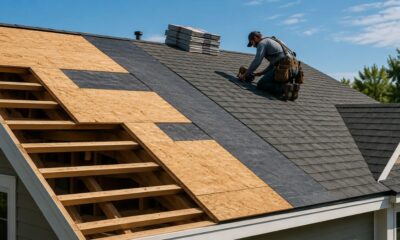
Proper Roofing Nail Installation
Correct installation is just as important as selecting the right fastener.
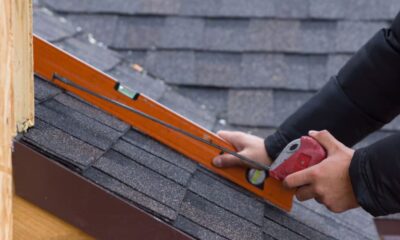
Proper Nail Placement
Roofing nails should be driven:
- Straight into the deck
- Flush with the shingle surface
- Within the manufacturer’s nailing zone
Incorrect placement can weaken the roofing system.
Roofing Nail Installation Checklist
| Installation Step | Purpose |
|---|---|
| Use correct nail length | Ensures proper penetration |
| Drive nails straight | Prevents material damage |
| Keep nail heads flush | Maximizes holding strength |
| Follow shingle nailing pattern | Meets manufacturer requirements |
| Avoid overdriving | Prevents shingle tearing |
Signs of Correct Installation
Properly installed roofing nails should:
- Sit flat against the shingle
- Avoid cutting into the material
- Penetrate the decking adequately
- Remain evenly spaced
Roofing Nails vs Common Nails
Many homeowners wonder whether standard nails can be used for roofing projects.
The short answer is no.
Roofing nails are specifically engineered for roofing systems, while common nails are designed for general construction.
| Feature | Roofing Nails | Common Nails |
|---|---|---|
| Head Size | Large | Small |
| Weather Resistance | High | Limited |
| Roofing Approved | Yes | No |
| Wind Resistance | Strong | Lower |
| Warranty Compliance | Yes | Often No |
Using common nails can increase the likelihood of leaks and roof failure.
Pros and Cons of Roofing Nails
Pros
- Strong holding power
- Affordable roofing fastener solution
- Easy installation
- Widely available
- Suitable for most roofing systems
- Long-lasting with proper coatings
Cons
- Incorrect sizing can cause problems
- Some materials are expensive
- Poor installation can reduce effectiveness
- May require specialized tools for large projects
Common Roofing Nail Mistakes
Even experienced DIYers occasionally make mistakes when installing roofing nails.
Overdriven Nails
Overdriving occurs when the nail head cuts into the shingle.
Consequences include:
- Reduced holding power
- Increased leak potential
- Wind damage vulnerability
Underdriven Nails
Underdriven nails leave the head raised above the surface.
This can:
- Damage overlying shingles
- Create uneven surfaces
- Reduce roof performance
Wrong Nail Length
Using nails that are too short prevents adequate deck penetration.
Using nails that are too long may create unnecessary exposure beneath the roof deck.
Incorrect Nail Placement
Placing nails outside the designated nailing zone can void manufacturer warranties and increase blow-off risks.
Best Practices for Using Roofing Nails
Following proven roofing practices improves durability and overall performance.
Use Manufacturer Recommendations
Always follow the roofing manufacturer’s fastening guidelines.
Match Materials Properly
Pair roofing materials with compatible fasteners to avoid corrosion issues.
Inspect Fasteners Before Installation
Check for:
- Rust
- Damage
- Bent shanks
- Manufacturing defects
Use Quality Roofing Nail Guns
Professional-grade roofing nailers provide consistent depth control and faster installation.
Increase Fasteners in High-Wind Areas
Regions prone to storms often require additional nails per shingle to improve wind resistance.
How Many Roofing Nails Are Needed Per Square?
A roofing square equals 100 square feet of roof area.
Typical requirements:
- Standard installation: Approximately 320 nails per square
- High-wind installation: Approximately 480 nails per square
Actual requirements vary by manufacturer specifications and local codes.
Conclusion
Roofing nails may seem like a small component of a roofing system, but they play a major role in long-term performance. The right nail type, material, length, and installation method can dramatically improve roof durability and weather resistance.
For most residential projects, galvanized roofing nails provide an excellent balance of affordability and protection. However, coastal environments may benefit from stainless steel options, while premium roofing systems often require specialized fasteners.
Before starting any roofing project, review manufacturer guidelines, local building codes, and environmental conditions to ensure you select the best roofing nails for the job.
FAQs
1. What size roofing nails should I use?
Most asphalt shingle installations use 1-inch to 1¼-inch roofing nails, depending on roofing layers and deck thickness.
2. Are galvanized roofing nails required?
In most cases, yes. Galvanized nails provide corrosion resistance and are commonly required by roofing manufacturers and building codes.
3. How many nails should be used per shingle?
Most standard installations require four nails per shingle, while high-wind areas often require six nails.
4. Can I use regular nails for roofing?
No. Regular construction nails lack the large head and weather resistance required for roofing applications.
5. What are the best roofing nails for coastal areas?
Stainless steel roofing nails are generally considered the best choice for coastal environments due to superior corrosion resistance.
/ You May Also Read /
Gable vs Hip Roof: Which Roof Style Is Better for Your Home?
Ridge Vent Roof: Complete Guide to Better Attic Ventilation, Energy Efficiency, and Roof Protection
HOME IMPROVEMENT
Footwear for Roofers: The Complete Guide to Safe, Comfortable, and Durable Roofing Shoes
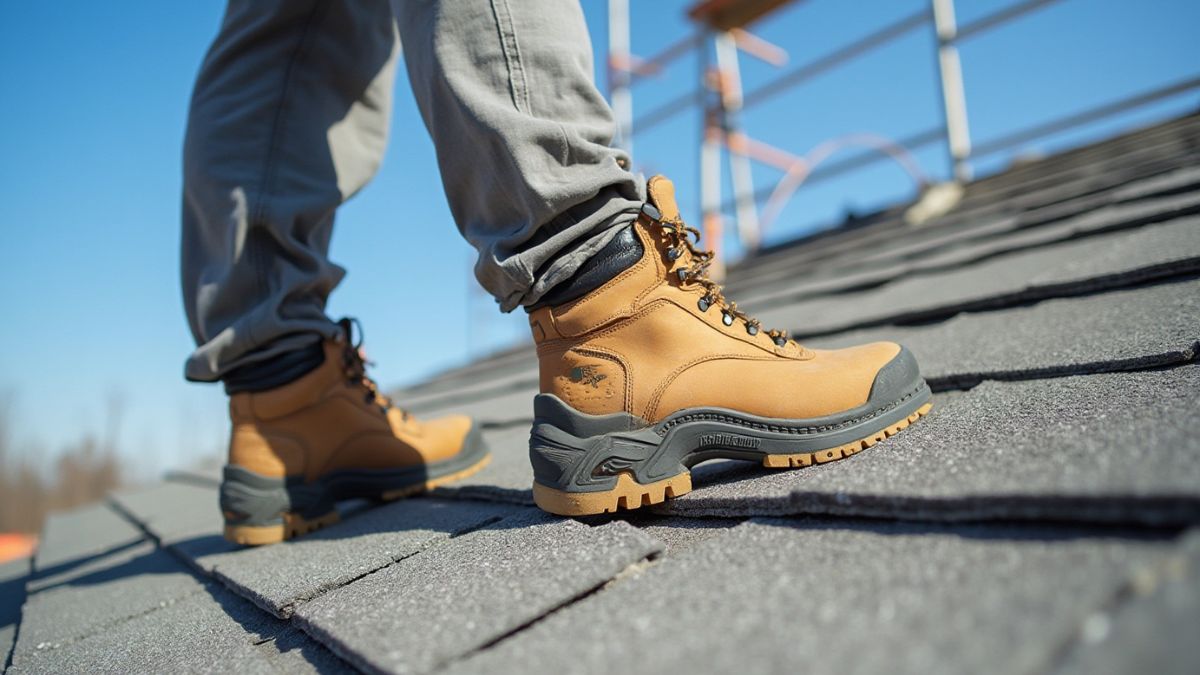
Roofing is one of the most physically demanding and hazardous jobs in the construction industry. Every step taken on a roof requires balance, traction, and confidence. That’s why choosing the right footwear for roofers is not just about comfort—it is a critical safety decision that can reduce the risk of slips, falls, and injuries.
Whether you are a professional roofing contractor, a construction worker, or a homeowner handling roofing projects, proper footwear can make a significant difference in performance and safety. The best roofing shoes provide excellent grip, flexibility, durability, and all-day comfort while working on different roof surfaces.
This guide covers everything you need to know about roofing footwear, including essential features, types of shoes, buying considerations, best practices, and common mistakes to avoid.
Why Proper Roofing Footwear Matters
Working on a roof presents unique challenges that ordinary work shoes often cannot handle.
Roofers frequently deal with:
- Steep slopes
- Wet surfaces
- Hot shingles
- Loose debris
- Long working hours
- Changing weather conditions
Proper roofing shoes help workers maintain traction and stability while reducing fatigue.
Key Benefits of Roofing Footwear
- Improved grip on roofing materials
- Better balance on sloped surfaces
- Reduced risk of slipping
- Enhanced comfort during long shifts
- Greater durability under harsh conditions
- Better foot and ankle support
Essential Features to Look for in Footwear for Roofers
Not all work shoes are suitable for roofing. Certain features are especially important when working at heights.
1. Superior Traction
Traction is the most important feature of roofing footwear.
Soft rubber outsoles generally provide better grip on shingles and metal roofing surfaces than hard rubber soles.
2. Flexible Soles
Flexible soles allow workers to feel the roof surface beneath their feet, improving balance and stability.
3. Lightweight Construction
Heavy boots can cause fatigue after hours of climbing ladders and moving across rooftops.
Lightweight footwear helps maintain energy levels throughout the day.
4. Durable Materials
Roofing work is tough on shoes.
Look for:
- Reinforced stitching
- Abrasion-resistant materials
- Durable rubber outsoles
- High-quality leather or synthetic uppers
5. Comfort and Cushioning
Comfort matters when spending eight or more hours on rooftops.
Quality cushioning helps reduce:
- Foot pain
- Knee strain
- Lower back discomfort
Roofing Footwear Feature Comparison
| Feature | Why It Matters | Ideal Choice |
|---|---|---|
| Traction | Prevents slipping | Soft rubber sole |
| Weight | Reduces fatigue | Lightweight design |
| Flexibility | Improves roof feel | Flexible sole |
| Durability | Extends lifespan | Reinforced construction |
| Comfort | Supports long workdays | Cushioned footbed |
| Support | Improves stability | Secure ankle support |
Types of Roofing Shoes and Boots
Different roofing jobs may require different types of footwear.
Athletic-Style Roofing Shoes
Many roofers prefer athletic-style shoes because they are lightweight and flexible.
Advantages:
- Excellent comfort
- Good traction
- Reduced fatigue
- Easy movement
Disadvantages:
- Less protection
- Shorter lifespan in demanding environments
Soft-Soled Work Boots
Soft-soled boots combine grip with additional protection.
Advantages:
- Better ankle support
- Durable construction
- Suitable for rough job sites
Disadvantages:
- Heavier than athletic shoes
Hiking Shoes
Quality hiking shoes can perform well on roofs due to their grip and stability.
Advantages:
- Good traction
- Durable materials
- Comfortable for long periods
Disadvantages:
- Some models may have overly aggressive tread patterns
Specialized Roofing Shoes
Some manufacturers design footwear specifically for roofing professionals.
Advantages:
- Optimized traction
- Roof-friendly soles
- Designed for steep surfaces
Disadvantages:
- Higher price point
Roofing Footwear Type Comparison
| Footwear Type | Traction | Comfort | Protection | Best Use |
|---|---|---|---|---|
| Athletic Shoes | High | High | Moderate | Residential roofing |
| Soft-Soled Boots | High | Moderate | High | Commercial roofing |
| Hiking Shoes | Moderate-High | High | Moderate | Mixed job sites |
| Roofing-Specific Shoes | Very High | High | Moderate | Professional roofers |
How Roofing Surface Affects Footwear Selection
Roofing materials impact how footwear performs.
Asphalt Shingles
Asphalt shingles are among the most common roofing materials.
Recommended features:
- Soft rubber soles
- Excellent grip
- Lightweight construction
Metal Roofs
Metal roofs can become extremely slippery.
Recommended features:
- Maximum traction
- Slip-resistant rubber
- Flexible sole design
Tile Roofs
Tile roofs require careful movement to avoid damaging materials.
Recommended features:
- Lightweight footwear
- Precise foot placement
- Good flexibility
Flat Roofs
Flat roofs often involve extensive walking.
Recommended features:
- Cushioning
- Arch support
- Durable outsoles
How to Choose the Right Roofing Footwear
The ideal roofing shoe depends on your work environment and personal preferences.
Roofing Shoe Selection Checklist
| Buying Factor | What to Consider |
|---|---|
| Roof Type | Shingle, tile, metal, or flat roof |
| Weather Conditions | Dry, wet, hot, or cold environments |
| Work Duration | Full-time or occasional use |
| Comfort Needs | Cushioning and arch support |
| Safety Requirements | Slip resistance and ankle stability |
| Budget | Initial cost versus long-term value |
Consider Your Workload
Professional roofers working daily should prioritize durability and support.
Occasional users may focus more on affordability and comfort.
Evaluate Weather Conditions
Roof temperatures can vary significantly throughout the year.
For hot climates:
- Breathable materials
- Lightweight construction
For colder climates:
- Insulated options
- Water-resistant materials
Best Practices for Roofing Footwear
Choosing quality footwear is only part of the equation.
Following proper practices improves safety and extends shoe life.
Keep Soles Clean
Debris can reduce traction.
Remove:
- Mud
- Gravel
- Dust
- Roofing materials
before climbing onto a roof.
Inspect Shoes Regularly
Check for:
- Worn tread
- Loose stitching
- Damaged soles
- Reduced grip
Replace footwear when performance declines.
Use Dedicated Roofing Shoes
Avoid wearing roofing shoes for everyday activities.
Dedicated footwear maintains optimal traction and longevity.
Match Footwear to Conditions
Different projects may require different footwear depending on:
- Roof pitch
- Surface material
- Weather conditions
Common Mistakes Roofers Make When Choosing Shoes
Many roofing accidents result from poor footwear choices.
Wearing Hard-Soled Boots
Hard soles often provide less grip on roofing materials.
Ignoring Comfort
Uncomfortable shoes can lead to fatigue, reducing focus and stability.
Choosing Style Over Function
Appearance should never take priority over safety.
Using Worn-Out Footwear
Old shoes may look fine but often lose their traction capabilities.
Not Testing Grip
Before starting work, always test footwear on a safe section of the roof.
Pros and Cons of Specialized Roofing Footwear
Pros
- Excellent traction
- Improved rooftop safety
- Enhanced comfort
- Better flexibility
- Reduced fatigue
- Designed specifically for roofing work
Cons
- Higher initial investment
- Limited use outside roofing tasks
- Some models wear faster on concrete surfaces
- May require frequent replacement under heavy use
Signs It’s Time to Replace Your Roofing Shoes
Even high-quality footwear eventually wears out.
Watch for these warning signs:
- Smooth or worn soles
- Reduced grip on shingles
- Torn uppers
- Flattened cushioning
- Loose seams
- Foot discomfort during work
Replacing shoes promptly helps maintain safety and productivity.
Best Practices for Maintaining Roofing Footwear
Proper maintenance can significantly extend the life of roofing shoes.
Clean After Every Job
Remove dirt and debris immediately after use.
Store Correctly
Keep footwear in a dry, ventilated area away from direct sunlight.
Rotate Pairs
Professional roofers often rotate between multiple pairs to reduce wear.
Avoid Excessive Heat Exposure
Extreme heat can damage rubber compounds and reduce grip performance.
Conclusion
Choosing the right footwear can dramatically improve safety, comfort, and productivity on the job. The best roofing shoes combine excellent traction, flexibility, durability, and support to help workers navigate challenging roof surfaces with confidence.
When evaluating footwear for roofing work, prioritize grip above all else. Consider the type of roofs you work on, the weather conditions you encounter, and the amount of time spent on rooftops. Investing in quality roofing footwear is a small expense compared to the benefits of improved safety and reduced injury risk.
By selecting appropriate shoes, maintaining them properly, and replacing them when necessary, roofers can work more efficiently while protecting themselves from unnecessary hazards.
Frequently Asked Questions
1. What type of shoes do professional roofers wear?
Most professional roofers prefer soft-soled work boots, roofing-specific shoes, or athletic-style footwear with excellent rubber traction.
2. Are work boots good for roofing?
Some work boots are suitable if they have soft, slip-resistant rubber soles and enough flexibility for rooftop movement.
3. Why do roofers prefer soft rubber soles?
Soft rubber provides better grip on shingles and other roofing materials, helping reduce slip risks.
4. Can hiking shoes be used for roofing?
Yes, many hiking shoes offer good traction and comfort, although some aggressive tread patterns may not perform optimally on certain roof surfaces.
5. How often should roofing shoes be replaced?
Replacement depends on usage, but shoes should be replaced when traction decreases, soles wear out, or structural damage appears.
/ You May Also Read /
The Complete Guide to Roofing Shoes: Safety, Grip, and Performance on Every Roof
Roof Cricket: Complete Guide to Design, Purpose, Installation, and Best Practices
Choosing the right roofing material is one of the most important decisions a homeowner can make. A roof protects your property, affects energy efficiency, and influences long-term maintenance costs. Among the many roofing options available today, rubber shingles have gained significant attention for their durability, sustainability, and attractive appearance.
Whether you’re replacing an aging roof or building a new home, understanding how rubber roofing shingles work can help you make an informed decision. This guide explores their benefits, costs, installation process, maintenance requirements, and how they compare to other popular roofing materials.
What Are Rubber Shingles?
Rubber shingles are roofing materials primarily manufactured from recycled rubber, synthetic polymers, or a blend of engineered materials. Many products are made from recycled tires, making them an environmentally friendly roofing solution.
Unlike traditional asphalt shingles, rubber-based roofing products are designed to mimic the appearance of slate, cedar shakes, or architectural shingles while providing superior flexibility and impact resistance.
How Rubber Shingles Work
These shingles are engineered to:
- Resist cracking and splitting
- Withstand extreme weather conditions
- Expand and contract with temperature changes
- Provide long-lasting roof protection
- Reduce landfill waste through recycled materials
Because of their flexibility, they perform exceptionally well in regions that experience frequent temperature fluctuations.
Benefits of Rubber Shingles
Homeowners often choose rubber roofing because it offers a unique combination of durability, appearance, and sustainability.
Outstanding Durability
One of the biggest advantages is longevity. Many rubber roofing products can last between 30 and 50 years when properly installed and maintained.
Benefits include:
- High impact resistance
- Excellent weather protection
- Reduced cracking compared to asphalt
- Strong resistance to hail damage
- Better flexibility in cold climates
Eco-Friendly Roofing Option
Many manufacturers use recycled materials, helping reduce environmental waste.
Environmental benefits include:
- Recycled content from tires and plastics
- Reduced landfill contributions
- Lower resource consumption
- Potential LEED project compatibility
Attractive Appearance
Modern manufacturing techniques allow rubber roofing products to closely resemble premium materials such as:
- Natural slate
- Cedar shakes
- Traditional wood shingles
- Architectural roofing systems
As a result, homeowners can achieve a luxury look without the high cost and maintenance requirements of natural materials.
Rubber Shingles vs Other Roofing Materials
Comparing roofing options helps homeowners understand where rubber products fit within the market.
| Roofing Material | Average Lifespan | Impact Resistance | Maintenance Level | Eco-Friendliness |
|---|---|---|---|---|
| Rubber Shingles | 30–50 Years | Excellent | Low | High |
| Asphalt Shingles | 15–30 Years | Moderate | Moderate | Low |
| Metal Roofing | 40–70 Years | High | Low | Moderate |
| Wood Shakes | 20–40 Years | Low | High | Moderate |
| Slate Roofing | 75–100+ Years | High | Low | Moderate |
This comparison shows why many homeowners view rubber roofing as a balanced solution between cost, durability, and sustainability.
Types of Rubber Shingles
Not all rubber roofing products are identical. Different styles are designed for varying aesthetic and performance needs.
Synthetic Slate Shingles
Synthetic slate replicates the appearance of natural stone roofing while remaining lighter and easier to install.
Advantages include:
- Lower structural load
- Reduced installation complexity
- Premium appearance
- Improved impact resistance
Synthetic Cedar Shake Shingles
These products imitate traditional wood shakes while eliminating common issues such as:
- Rot
- Insect damage
- Splitting
- Excessive moisture absorption
Architectural Rubber Roofing
Architectural styles focus on enhanced curb appeal and dimensional appearance.
They are often selected for:
- High-end residential projects
- Luxury homes
- Custom-built properties
Cost of Rubber Shingles
Roofing costs vary depending on roof size, labor rates, location, and product quality.
Typical Cost Factors
Several elements influence total project expenses:
- Roofing material quality
- Roof complexity
- Local labor costs
- Removal of existing roofing
- Roof pitch and accessibility
| Cost Component | Typical Range |
|---|---|
| Materials | $4–$12 per sq. ft. |
| Installation | $3–$8 per sq. ft. |
| Roof Removal | $1–$5 per sq. ft. |
| Total Installed Cost | $7–$20 per sq. ft. |
Although initial costs may be higher than asphalt shingles, the longer lifespan often improves long-term value.
Long-Term Savings
Homeowners may save money through:
- Fewer repairs
- Reduced replacement frequency
- Improved durability
- Potential insurance discounts in hail-prone areas
Installation Process
Professional installation is strongly recommended for optimal performance.
Roof Inspection
Before installation begins, contractors typically evaluate:
- Roof decking condition
- Structural integrity
- Existing ventilation
- Moisture issues
Underlayment Installation
A protective underlayment is applied to provide additional water resistance and improve overall roof performance.
Shingle Placement
Installers then secure the shingles according to manufacturer specifications.
Proper installation helps ensure:
- Weather resistance
- Wind protection
- Warranty compliance
- Maximum lifespan
Common Applications
Rubber roofing products work well across a variety of residential and commercial projects.
Residential Homes
Homeowners frequently choose them for:
- New construction
- Roof replacement projects
- Historic-style homes
- Luxury residences
Commercial Buildings
Commercial property owners appreciate their:
- Durability
- Low maintenance
- Long service life
- Sustainability benefits
Maintenance Requirements
One reason homeowners appreciate rubber roofing is its relatively low maintenance needs.
Routine Maintenance Checklist
Inspect the roof at least twice per year and after major storms.
Recommended tasks include:
- Remove debris
- Clean gutters
- Check flashing
- Inspect for loose shingles
- Monitor drainage areas
| Maintenance Task | Recommended Frequency |
|---|---|
| Visual Inspection | Twice Yearly |
| Gutter Cleaning | Every 3–6 Months |
| Storm Damage Check | After Severe Weather |
| Professional Inspection | Every 2–3 Years |
Regular inspections help identify minor issues before they become costly repairs.
Pros and Cons of Rubber Shingles
Every roofing material has strengths and limitations.
Pros
- Long lifespan
- Excellent impact resistance
- Eco-friendly manufacturing
- Attractive appearance
- Lightweight compared to slate
- Low maintenance requirements
- Good weather performance
Cons
- Higher upfront cost than asphalt
- Limited product availability in some regions
- Professional installation recommended
- Color fading may occur over time with certain products
Common Mistakes to Avoid
Homeowners can maximize roofing performance by avoiding several common mistakes.
Choosing Based Only on Initial Price
The cheapest roofing option is not always the most economical over time. Lifespan and maintenance costs should also be considered.
Ignoring Manufacturer Specifications
Improper installation can reduce roof performance and potentially void warranties.
Skipping Roof Inspections
Small issues can become expensive repairs if left unnoticed.
Hiring Unqualified Contractors
Roofing quality depends heavily on installation expertise. Always verify licensing, insurance, and experience.
Best Practices for Getting the Most from Your Roof
Following proven roofing practices can significantly extend performance.
Select High-Quality Products
Premium products often provide:
- Better warranties
- Improved weather resistance
- Greater durability
Work with Experienced Installers
Qualified professionals understand:
- Proper fastening methods
- Ventilation requirements
- Local building codes
Maintain Adequate Ventilation
Proper attic ventilation helps:
- Prevent moisture buildup
- Reduce heat accumulation
- Improve roofing lifespan
Schedule Regular Inspections
Preventive maintenance remains one of the most effective ways to protect your roofing investment.
Are Rubber Shingles Worth It?
For many homeowners, the answer is yes.
If you value durability, sustainability, and long-term performance, rubber roofing offers compelling advantages. While the upfront investment may exceed traditional asphalt shingles, the extended lifespan and reduced maintenance often provide strong overall value.
Homeowners in regions with severe weather, hailstorms, or fluctuating temperatures may find rubber roofing particularly beneficial due to its flexibility and impact resistance.
Conclusion
Rubber shingles have become a popular roofing solution because they combine durability, environmental responsibility, and attractive aesthetics. They provide excellent protection against weather, require minimal maintenance, and can last decades when properly installed.
Although the initial investment is higher than some traditional roofing materials, many homeowners appreciate the long-term savings and peace of mind that come with a durable roofing system. By choosing quality materials, hiring experienced installers, and following proper maintenance practices, you can maximize the value of your roofing investment for years to come.
Frequently Asked Questions
1. How long do rubber shingles last?
Most quality rubber roofing products last between 30 and 50 years, depending on installation quality, climate, and maintenance.
2. Are rubber shingles better than asphalt shingles?
They generally offer greater durability, better impact resistance, and a longer lifespan, although they typically cost more upfront.
3. Can rubber shingles withstand hail?
Yes. Many rubber roofing products are specifically designed to provide excellent impact resistance against hail and storm damage.
4. Are rubber shingles environmentally friendly?
Many are manufactured using recycled materials, making them one of the more sustainable roofing options available.
5. Do rubber shingles require special maintenance?
No. Routine inspections, debris removal, and gutter cleaning are usually sufficient to keep the roof performing well.
/ You May Also Read /
How Long Does a Roof Last? A Complete Guide to Roof Lifespan and Replacement
Roof Sheathing: Complete Guide to Types, Materials, Costs, Installation, and Maintenance
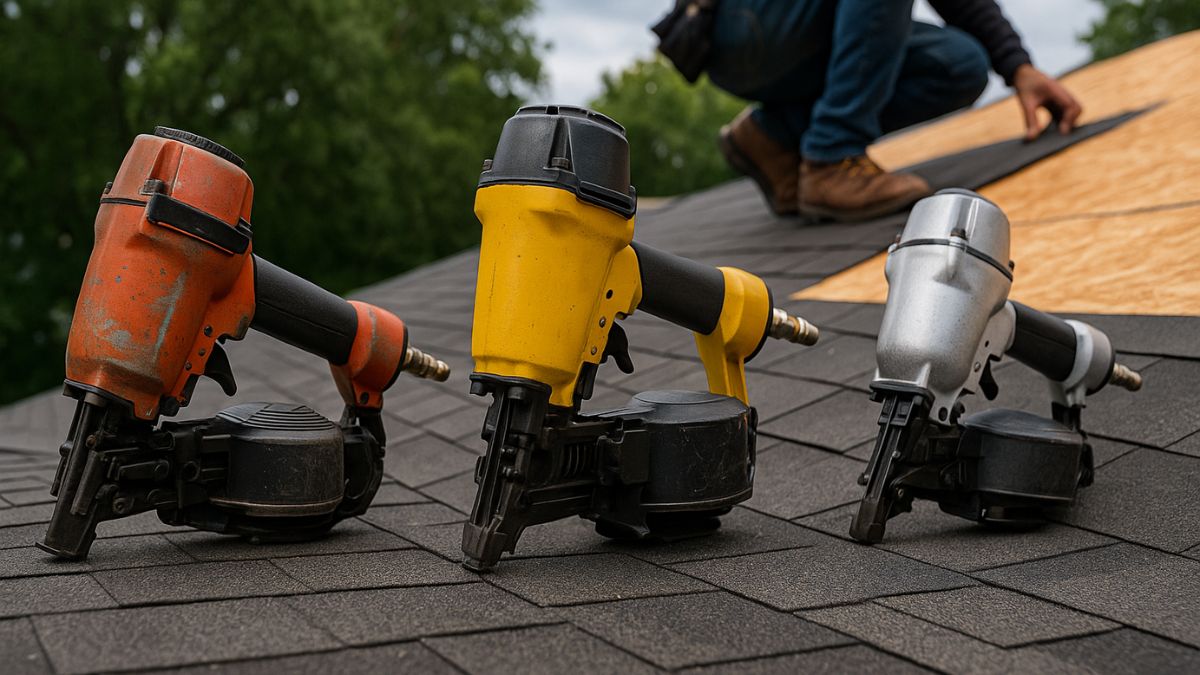
Installing a roof is one of the most demanding construction tasks, and having the right tools can make a huge difference. A roofing nail gun helps contractors and DIY enthusiasts install shingles quickly, accurately, and consistently. Compared to manual hammering, it saves time, reduces fatigue, and improves productivity on roofing projects.
Whether you’re replacing a damaged roof, installing new shingles, or working professionally in roofing, understanding how a roofing nail gun works will help you make better purchasing and usage decisions.
What Is a Roofing Nail Gun?
A roofing nail gun is a specialized power tool designed to drive roofing nails into shingles, underlayment, and roofing materials. It uses compressed air, battery power, or fuel-cell technology to fire nails rapidly and consistently.
Unlike framing nailers or finish nailers, roofing nailers are specifically engineered for roofing applications and typically use coil nails that allow for higher nail capacity.
Key Features of Roofing Nail Guns
- Fast nail installation
- Adjustable depth settings
- High-capacity coil magazines
- Lightweight construction
- Safety trigger mechanisms
- Durable weather-resistant components
How Does a Roofing Nail Gun Work?
The tool drives nails using a powered mechanism. Depending on the model, power may come from:
- Air compressors (pneumatic)
- Rechargeable batteries
- Fuel-cell systems
- Hybrid battery-fuel technology
When the trigger is activated and the nose contacts the roofing surface, the nail is driven into the material at high speed.
Types of Roofing Nail Gun Options
Choosing the right roofing nail gun starts with understanding the available types.
Pneumatic Roofing Nail Gun
Pneumatic models operate using compressed air supplied by an air compressor.
Advantages:
- Consistent performance
- Lightweight design
- Lower purchase cost
- Suitable for large roofing projects
Disadvantages:
- Requires air compressor
- Air hose limits mobility
Cordless Roofing Nail Gun
Cordless models use rechargeable batteries.
Advantages:
- Excellent portability
- No air hose required
- Easy setup
Disadvantages:
- Higher initial cost
- Limited battery runtime
Fuel-Powered Roofing Nail Gun
These models use a fuel cartridge combined with a battery.
Advantages:
- Powerful performance
- Good mobility
Disadvantages:
- Ongoing fuel costs
- More maintenance requirements
Roofing Nail Gun Type Comparison
| Roofing Nailer Type | Power Source | Mobility | Maintenance | Best For |
|---|---|---|---|---|
| Pneumatic | Air Compressor | Moderate | Low | Professional crews |
| Cordless | Battery | High | Low | DIY and contractors |
| Fuel-Powered | Fuel + Battery | High | Moderate | Remote job sites |
Benefits of Using a Roofing Nail Gun
Roofing projects often involve thousands of nails. A roofing nailer significantly increases efficiency.
Faster Installation
A skilled roofer can install shingles much faster with a nail gun than with a traditional hammer.
Consistent Nail Placement
Proper nail depth is critical for roof durability. Most nail guns offer depth adjustment settings that improve consistency.
Reduced Physical Strain
Repeated hammering can cause fatigue and strain injuries. Nail guns reduce repetitive motion and improve comfort.
Improved Productivity
Roofing crews can complete projects faster, increasing profitability and reducing labor costs.
How to Choose the Best Roofing Nail Gun
The ideal tool depends on your project size, budget, and work environment.
Consider Power Source
Think about where you’ll be working.
- Pneumatic for maximum efficiency
- Cordless for portability
- Fuel-powered for remote locations
Check Nail Compatibility
Not all roofing nailers support the same nail sizes.
Look for:
- Nail length range
- Coil compatibility
- Roofing material requirements
Evaluate Weight
Since roofing involves working at heights, a lighter tool reduces fatigue and improves control.
Review Depth Adjustment Features
Accurate nail depth prevents:
- Overdriven nails
- Underdriven nails
- Shingle damage
Essential Buying Factors
| Feature | Why It Matters |
|---|---|
| Weight | Reduces user fatigue |
| Magazine Capacity | Fewer reload interruptions |
| Depth Adjustment | Better shingle installation |
| Trigger Type | Improved safety and control |
| Durability | Longer service life |
| Warranty | Better long-term value |
Common Roofing Nail Sizes
Selecting the correct nail size is crucial for building code compliance and roof longevity.
Typical Roofing Nail Lengths
| Nail Length | Common Application |
|---|---|
| 3/4 Inch | Thin roofing materials |
| 1 Inch | Standard shingles |
| 1 1/4 Inch | Multi-layer roofing |
| 1 1/2 Inch | Thick roofing systems |
Always verify local building code requirements before starting a project.
How to Use a Roofing Nail Gun Properly
Using the tool correctly improves safety and installation quality.
Step 1: Prepare the Roof Surface
Ensure the roof deck is:
- Clean
- Dry
- Structurally sound
Step 2: Load Coil Nails
Follow manufacturer instructions and verify nail compatibility.
Step 3: Adjust Nail Depth
Test the depth setting on scrap material before beginning installation.
Step 4: Position the Tool Correctly
Keep the nail gun perpendicular to the roofing surface for proper nail placement.
Step 5: Follow Manufacturer Shingle Guidelines
Different shingle brands require specific nailing patterns and placement zones.
Roofing Nail Gun Safety Tips
Roofing work combines power tools and elevated surfaces, making safety essential.
Wear Proper Safety Equipment
Use:
- Safety glasses
- Work gloves
- Non-slip roofing shoes
- Hearing protection
- Hard hat when necessary
Keep Hands Clear
Never place hands near the firing area.
Inspect Equipment Regularly
Check:
- Air hoses
- Battery condition
- Trigger operation
- Fastener feed system
Avoid Unsafe Trigger Practices
Always use manufacturer-approved trigger settings and safety mechanisms.
Maintain Secure Roof Positioning
Keep stable footing and avoid reaching excessively while operating the tool.
Best Practices for Roofing Nail Gun Performance
Following proven practices can improve efficiency and tool longevity.
Use High-Quality Roofing Nails
Cheap fasteners may cause jams and inconsistent performance.
Clean the Tool Regularly
Remove:
- Dust
- Debris
- Shingle granules
Store Properly
Keep the nailer in a dry environment when not in use.
Follow Maintenance Schedules
Regular lubrication and inspections extend service life.
Roofing Nail Gun Maintenance Checklist
| Maintenance Task | Recommended Frequency |
|---|---|
| Clean Magazine | After Each Project |
| Inspect Trigger | Weekly |
| Check Fasteners | Before Use |
| Lubricate Components | As Recommended |
| Inspect Air Connections | Weekly |
Common Roofing Nail Gun Mistakes
Even experienced users occasionally make mistakes that affect roofing quality.
Using Incorrect Nail Length
Improper nail length can weaken shingle attachment.
Overdriving Nails
Overdriven nails may damage shingles and reduce wind resistance.
Ignoring Depth Settings
Incorrect depth adjustments lead to inconsistent installations.
Skipping Maintenance
Poor maintenance increases downtime and repair costs.
Using the Wrong Nail Type
Always verify nail specifications for your roofing material.
Pros and Cons of Roofing Nail Guns
Pros
- Faster installation speed
- Consistent nail placement
- Reduced physical effort
- Increased productivity
- Professional-quality results
- Suitable for large projects
Cons
- Higher upfront cost than hammers
- Requires maintenance
- Potential safety risks if misused
- Pneumatic models require compressors
- Learning curve for beginners
When Is a Roofing Nail Gun Worth It?
A roofing nail gun is worth the investment for homeowners tackling large roofing projects and professionals completing frequent installations.
If you plan to install hundreds or thousands of shingles, the time savings alone can justify the cost. For roofing contractors, a quality nail gun quickly becomes an essential productivity tool.
Conclusion
A roofing nail gun is one of the most valuable tools for modern roofing work. It improves speed, consistency, and overall installation quality while reducing physical strain. Whether you choose a pneumatic, cordless, or fuel-powered model, selecting the right tool for your project can lead to better results and greater efficiency.
Before buying, consider power source, weight, nail compatibility, and safety features. With proper maintenance and safe operation, a quality roofing nail gun can provide years of reliable performance and help you complete roofing projects with confidence.
Frequently Asked Questions
1. What is a roofing nail gun used for?
A roofing nail gun is used to install roofing shingles, underlayment, and other roofing materials quickly and consistently.
2. Are roofing nail guns better than hammers?
For most roofing projects, nail guns are faster, more efficient, and less physically demanding than manual hammering.
3. What nails do roofing nail guns use?
Most roofing nailers use coil roofing nails available in various lengths and materials.
4. Can beginners use a roofing nail gun?
Yes. Beginners can use one safely by following manufacturer instructions, wearing protective equipment, and practicing proper technique.
5. What is the best type of roofing nail gun?
Pneumatic roofing nailers are popular among professionals, while cordless models offer greater portability for homeowners and contractors.
/ You May Also Read /
Roof Decking: Complete Guide to Materials, Installation, Costs, and Maintenance
Roofing Cop: What It Means, How It Works, and Why Property Owners Use Roofing Advocacy Services
-
 HOME IMPROVEMENT2 weeks ago
Roof Sheathing: Complete Guide to Types, Materials, Costs, Installation, and Maintenance
-
 HOME IMPROVEMENT2 weeks ago
How Long Does a Roof Last? A Complete Guide to Roof Lifespan and Replacement
-

 HOME IMPROVEMENT2 weeks ago
Roofing Cop: What It Means, How It Works, and Why Property Owners Use Roofing Advocacy Services
-
 HOME IMPROVEMENT2 weeks ago
Roof Decking: Complete Guide to Materials, Installation, Costs, and Maintenance
-

 HOME IMPROVEMENT2 weeks ago
Gable vs Hip Roof: Which Roof Style Is Better for Your Home?
-
 HOME IMPROVEMENT2 weeks ago
Ridge Vent Roof: Complete Guide to Better Attic Ventilation, Energy Efficiency, and Roof Protection
-
 HOME IMPROVEMENT2 weeks ago
The Complete Guide to Roofing Shoes: Safety, Grip, and Performance on Every Roof
-
 HOME IMPROVEMENT2 weeks ago
Roof Pitch Chart Explained: How to Measure, Read, and Use Roof Slope Data